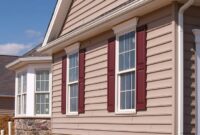
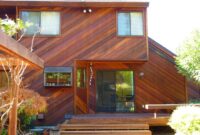
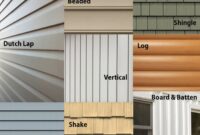
Exterior shiplap, a classic siding choice, offers timeless appeal and versatility. From its varied styles—beaded, board and batten, and more—to the diverse materials available, such as cedar, pine, fiber cement, and vinyl, understanding its nuances is key to achieving a stunning home exterior. This guide delves into every aspect, from installation techniques and cost considerations to maintenance strategies, empowering you to make informed decisions for your next project.
We’ll explore the aesthetic impact of different shiplap profiles on various architectural styles, comparing the pros and cons of each material and installation method. This comprehensive overview aims to equip you with the knowledge to confidently select, install, and maintain exterior shiplap siding, ensuring its longevity and enhancing your home’s curb appeal.
Exterior Shiplap Styles
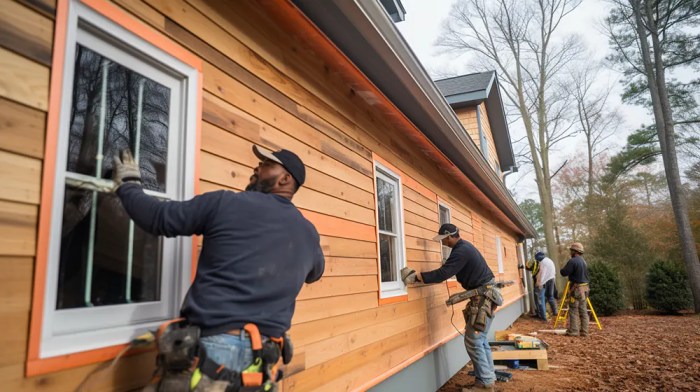
Exterior shiplap siding offers a timeless and versatile aesthetic for homes, contributing significantly to curb appeal and overall property value. The varied styles available allow homeowners to customize their home’s exterior to reflect their personal preferences and architectural style, ranging from rustic charm to modern elegance. Understanding the nuances of different shiplap profiles is crucial for making informed decisions during the design and construction phases.
Shiplap Style Variations
Shiplap siding comes in various styles, each offering a unique visual impact. The choice of style can dramatically alter the perceived size and proportion of a house, as well as its overall character. Consideration should be given to the home’s architectural style, the surrounding landscape, and personal aesthetic preferences when selecting a shiplap style.
| Style Name | Description | Common Wood Types | Typical Applications |
|---|---|---|---|
| Beaded Shiplap | Features a small, decorative bead along the edge of each board, adding texture and visual interest. | Cedar, Pine, Redwood | Traditional homes, cottages, rustic designs |
| Board and Batten | Uses wider vertical boards with narrower strips (battens) covering the seams. Creates a more structured and vertical emphasis. | Cedar, Pine, Fir | Farmhouses, contemporary homes, modern rustic designs |
| Channel Shiplap | Features a groove or channel along the edge of each board, creating a distinct shadow line. | Cedar, Pine, Cypress | Modern farmhouse styles, contemporary designs |
| Vertical Shiplap | Installed vertically rather than horizontally, creating a visually taller and more slender appearance for the home. | Cedar, Pine, Fiber Cement | Modern homes, narrow or tall homes, creating a sense of height |
Aesthetic Impact of Shiplap Styles
The style of shiplap significantly influences a home’s overall aesthetic. For instance, beaded shiplap lends a classic, rustic charm, often associated with cozy cottages and traditional homes. The subtle texture created by the beading adds depth and visual warmth. Conversely, board and batten shiplap, with its clean lines and vertical orientation, projects a more modern and structured feel, often seen in contemporary farmhouses or minimalist designs. Channel shiplap, with its distinct shadow lines, contributes to a sleek, sophisticated appearance, ideal for modern or transitional homes. The choice between horizontal and vertical shiplap dramatically impacts the perceived proportions of a house; vertical shiplap can make a low-slung home appear taller, while horizontal shiplap can emphasize the breadth of a wide facade. A home clad in vertical shiplap might feel more elegant and refined, whereas horizontal shiplap could evoke a feeling of warmth and approachability.
Visual Appeal Comparison of Shiplap Profiles
Different shiplap profiles offer distinct visual appeals. Beaded shiplap’s subtle texture creates a visually rich surface, while board and batten provides a strong sense of verticality and architectural definition. Channel shiplap offers a more contemporary feel with its clean lines and shadow play. The choice often depends on the desired level of visual texture and the overall design aesthetic. A home with smooth, channel shiplap might feel more minimalist, while a home with beaded shiplap could feel more rustic and inviting. The interplay of light and shadow also varies across different profiles. Beaded shiplap tends to catch the light more dramatically, creating a more textured appearance, whereas channel shiplap might create more subtle shadows that add depth without overwhelming the overall design. A comparison of these profiles side-by-side would highlight the differences in texture, shadow lines, and overall visual impact.
Materials Used in Exterior Shiplap
Choosing the right material for your exterior shiplap is crucial, impacting both the aesthetic appeal and the longevity of your home’s siding. The selection depends on factors like budget, desired maintenance level, and the overall style of your house. This section details the properties, maintenance requirements, and aging characteristics of popular shiplap materials.
Cedar Shiplap
Cedar is a prized material for exterior shiplap due to its natural beauty and inherent resistance to rot and decay. Its rich reddish-brown hue adds warmth and sophistication to any home.
- Advantages: Naturally resistant to rot and insects; aesthetically pleasing; relatively easy to work with; pleasant aroma.
- Disadvantages: More expensive than other options; can be susceptible to warping or cracking if not properly treated; requires regular maintenance to preserve its appearance.
Cedar’s natural oils provide some level of protection, but regular cleaning and occasional application of a high-quality wood sealant or stain are essential to prevent weathering and prolong its lifespan. Over time, untreated cedar will gradually turn a silvery-gray, a characteristic many find appealing, representing a natural aging process. Properly maintained cedar shiplap can last for decades, retaining its beauty with appropriate care.
Pine Shiplap, Exterior shiplap
Pine is a more economical alternative to cedar, offering a classic and versatile look. It’s readily available and easy to work with, making it a popular choice for DIY projects.
- Advantages: Affordable; readily available; easy to work with; accepts paint and stain well.
- Disadvantages: Less naturally resistant to rot and insects than cedar; requires more frequent maintenance; prone to warping and cracking without proper treatment.
Pine requires more diligent maintenance than cedar. Regular applications of a quality wood preservative, along with prompt attention to any signs of damage, are crucial. Untreated pine will weather quickly, turning gray and potentially developing mildew or mold. Painted pine will show its age through chipping and fading, requiring repainting every few years.
Fiber Cement Shiplap
Fiber cement shiplap offers a durable and low-maintenance alternative to wood. Made from a composite of cement, cellulose fibers, and other additives, it’s designed to withstand harsh weather conditions.
- Advantages: Extremely durable and long-lasting; resistant to rot, insects, and fire; low maintenance; requires minimal painting or staining.
- Disadvantages: Can be more expensive than wood; heavier and more difficult to install than wood; susceptible to cracking if improperly installed.
Fiber cement requires minimal maintenance, typically just occasional cleaning to remove dirt and debris. Its color is typically consistent throughout its lifespan, though minor fading might occur over many decades. Proper installation is crucial to prevent cracking and ensure longevity.
Vinyl Shiplap
Vinyl shiplap provides a budget-friendly and virtually maintenance-free option. It mimics the look of wood but requires no painting or staining.
- Advantages: Affordable; low maintenance; resistant to rot, insects, and moisture; wide variety of colors and styles available.
- Disadvantages: Can fade over time; prone to dents and scratches; may not have the same aesthetic appeal as natural wood; can expand and contract with temperature changes.
Vinyl shiplap requires only occasional cleaning with soap and water. While it is highly resistant to weathering, prolonged sun exposure can lead to fading. Dents and scratches are possible, but they are usually less noticeable than on wood. The appearance remains relatively consistent, though some discoloration may occur over time due to UV exposure.
Installation Methods for Exterior Shiplap
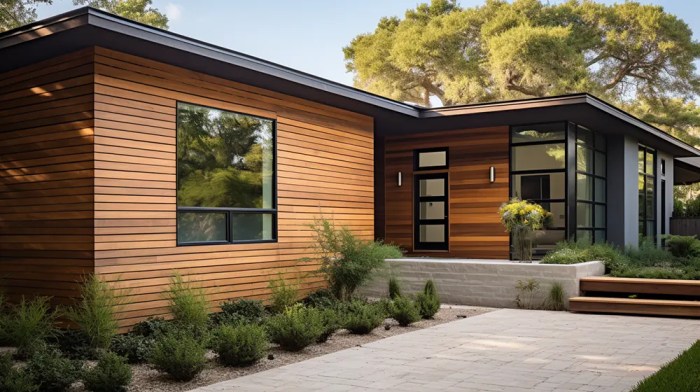
Installing exterior shiplap siding requires careful planning and execution to ensure a durable and aesthetically pleasing finish. Proper preparation, precise fastening, and meticulous finishing are crucial for a successful installation that will withstand the elements for years to come. This section details the step-by-step process, necessary tools, and visual representation of a typical installation.
The installation process involves several key stages, each demanding attention to detail. Failure to properly execute any step can compromise the overall integrity and appearance of the finished product. Therefore, understanding each stage is paramount for a successful project.
Preparation for Shiplap Installation
Before beginning the installation, thorough preparation is essential. This includes ensuring the underlying surface is properly prepared to receive the shiplap siding. This involves checking for any damage to the sheathing, ensuring it’s properly leveled and plumb, and addressing any moisture issues. Any damaged areas should be repaired before proceeding. Furthermore, the correct type of building paper or house wrap should be installed to provide a weather barrier. Finally, marking the starting point and establishing a consistent level line is critical for achieving a neat and professional finish.
Step-by-Step Shiplap Installation
The following steps Artikel the typical installation process for exterior shiplap siding. Each step is crucial for ensuring a long-lasting and visually appealing result.
- Establish a Level Baseline: Begin by establishing a level baseline along the bottom of the wall. This ensures the first row of shiplap is perfectly level, setting the standard for the rest of the installation.
- Install the First Row: Attach the first row of shiplap to the prepared wall using appropriate fasteners, ensuring proper spacing and alignment with the baseline. The bottom edge of the first row should align perfectly with the established baseline.
- Install Subsequent Rows: Continue installing subsequent rows, ensuring proper overlap and alignment with the previous row. Use a level to check the alignment frequently and maintain a consistent look. The overlap should be consistent throughout the project.
- Fastening: Use appropriate exterior-grade fasteners, such as galvanized nails or screws, to secure each piece of shiplap. Avoid overdriving fasteners, which can damage the shiplap and create unsightly blemishes. Fasteners should be driven straight and flush with the surface.
- Caulking and Sealing: After installing all shiplap, caulk all seams and joints to prevent water penetration. Pay close attention to corners, edges, and around windows and doors. A high-quality exterior-grade caulk is essential for long-term protection.
- Finishing Touches: Once the caulk is dry, inspect the installation for any imperfections and address them as needed. This might include minor adjustments, touch-up paint, or additional caulking.
Visual Representation of Shiplap Installation
Imagine a wall, initially showing the underlying sheathing. Next, visualize a level line established along the bottom. The first row of shiplap is then installed, precisely aligned with this baseline. Subsequent rows are added, each overlapping the previous row by a consistent amount, creating a uniform, horizontal pattern across the wall. Finally, imagine the gaps between the shiplap pieces filled with caulk, creating a watertight seal. The overall appearance should be a clean, even surface of horizontally laid shiplap.
Tools and Equipment for Shiplap Installation
Proper tools are crucial for efficient and accurate shiplap installation. Having the right equipment ensures a professional finish and minimizes the risk of damage.
- Measuring tape
- Level
- Chalk line
- Circular saw or miter saw
- Nail gun or drill with appropriate bits
- Exterior-grade fasteners (nails or screws)
- Caulk gun and exterior-grade caulk
- Safety glasses and gloves
- Putty knife for caulk finishing
Exterior Shiplap in Different Architectural Styles
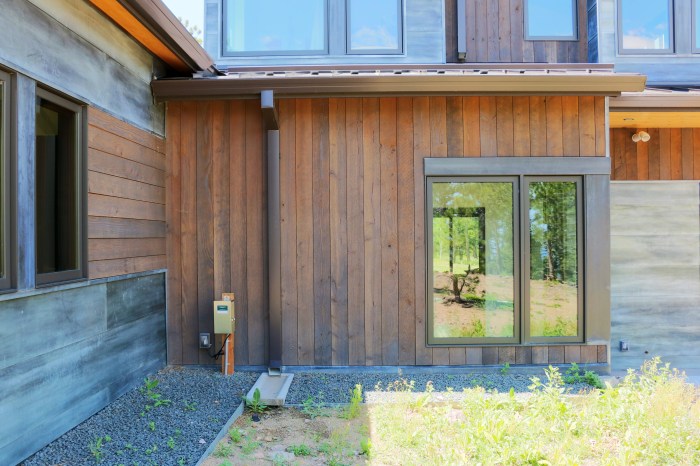
Exterior shiplap, with its clean lines and versatile aesthetic, complements a surprising range of architectural styles. Its adaptability stems from the variety of materials, finishes, and installation techniques available, allowing it to seamlessly integrate into both traditional and contemporary designs. Understanding how shiplap interacts with different architectural styles is crucial for achieving a cohesive and visually appealing exterior.
Shiplap’s Application in Farmhouse Style
Farmhouse style architecture emphasizes rustic charm and simplicity. Wide, thick shiplap siding, often painted a crisp white or a soft, muted color, perfectly embodies this aesthetic. The slightly uneven texture of the wood adds to the overall sense of warmth and coziness. Imagine a two-story farmhouse with wide white shiplap siding, accented by black window frames and a charming wraparound porch. The natural wood grain, subtly visible beneath the paint, contributes to the authentic, handcrafted feel. This contrasts beautifully with the clean lines of the windows and the simple, functional design of the house itself.
Shiplap’s Application in Craftsman Style
Craftsman style homes, known for their handcrafted details and natural materials, also benefit from the use of shiplap. However, in this context, the shiplap might be stained a darker color to highlight the wood grain, creating a richer, more textured appearance. The horizontal lines of the shiplap complement the low-pitched roofs and overhanging eaves characteristic of Craftsman architecture. Consider a Craftsman bungalow with stained shiplap siding, paired with exposed beams and stone accents. The darker stain emphasizes the natural wood grain, creating a more rustic and substantial look than the bright white of a farmhouse.
Shiplap’s Application in Modern Style
Modern architecture values clean lines, simplicity, and a minimalist aesthetic. Shiplap can be incorporated into modern designs by using narrower boards and a consistent, smooth finish. Often painted in neutral colors like gray or black, the shiplap provides a textural element without overwhelming the overall minimalist design. Visualize a sleek, contemporary home with narrow, dark gray shiplap siding, complemented by large windows and a flat roof. The clean lines and subtle texture of the shiplap add depth without detracting from the building’s modern aesthetic.
Shiplap’s Application in Coastal Style
Coastal style homes often evoke a relaxed, breezy feel. Shiplap, especially when painted in light, bright colors such as pale blues or creamy whites, perfectly captures this essence. The horizontal lines of the shiplap can create a sense of horizontal expanse, reflecting the vastness of the ocean. A coastal home might feature wide, white shiplap siding, accented with weathered gray trim and nautical-inspired details. The light color scheme keeps the exterior feeling airy and bright, echoing the coastal environment.
Shiplap Applications Across Architectural Styles
| Architectural Style | Suitable Shiplap Style | Material Recommendations | Visual Description |
|---|---|---|---|
| Farmhouse | Wide, thick boards | Painted cedar or pine | Crisp white or soft muted colors; visible texture adds warmth. |
| Craftsman | Medium width boards | Stained cedar or redwood | Darker stain highlighting wood grain; rustic and substantial feel. |
| Modern | Narrow boards | Painted fiber cement or metal | Clean lines, smooth finish; neutral colors like gray or black. |
| Coastal | Wide boards | Painted cedar or pine | Light, bright colors; airy and bright feel. |
Cost Considerations for Exterior Shiplap
The cost of installing exterior shiplap siding can vary significantly depending on several interconnected factors. Understanding these factors allows homeowners and contractors to make informed decisions and budget effectively for their projects. This section details the key cost drivers and offers strategies for cost mitigation.
Factors Influencing Exterior Shiplap Costs
Several factors contribute to the overall expense of an exterior shiplap project. These can be broadly categorized into material costs, labor costs, and regional variations. Careful consideration of each element is crucial for accurate budgeting.
| Factor | Description | Impact on Cost | Mitigation Strategies |
|---|---|---|---|
| Material Type | The choice of wood (e.g., cedar, pine, redwood), composite, or vinyl significantly impacts price. Premium woods like cedar command higher prices due to durability and aesthetics. | High-end materials like cedar increase costs substantially; vinyl and composite materials are generally more affordable. | Consider less expensive, but still durable, wood species like pine or fir. Explore composite or vinyl alternatives for budget-conscious projects. Opt for reclaimed wood for a cost-effective and sustainable choice, although sourcing may require more effort. |
| Material Grade and Quality | The grade of wood influences cost; higher grades with fewer knots and imperfections are more expensive. Similar considerations apply to composite and vinyl materials. | Higher-grade materials, offering better aesthetics and durability, increase the overall cost. | Choose a lower grade if the aesthetic imperfections are acceptable. Carefully inspect materials before installation to avoid issues later. |
| Quantity of Materials | The total square footage of the area to be covered directly impacts material costs. Larger projects naturally require more materials. | Directly proportional; larger areas mean higher material costs. | Precise measurements are essential to avoid over-ordering. Consider using a smaller-scale shiplap design to reduce the quantity needed, especially on large expanses. |
| Labor Costs | Labor costs vary by region and contractor experience. Complex installations, such as those requiring intricate cuts or extensive preparation, increase labor costs. | A significant portion of the overall cost; experienced contractors often charge more. | Obtain multiple quotes from different contractors. Consider DIY installation if you possess the necessary skills and tools, though this requires time and effort. |
| Regional Variations | Material costs and labor rates vary significantly depending on geographic location. Areas with high demand or limited material supply may have inflated prices. | Can significantly affect the total cost; coastal areas might have higher cedar costs. | Explore sourcing materials from different regions if feasible. Compare quotes from contractors in different locations. |
| Installation Complexity | The complexity of the installation, such as intricate designs or difficult-to-access areas, affects labor time and cost. | More complex projects increase both material and labor costs. | Simplify the design where possible to reduce installation complexity. Thorough planning minimizes on-site issues and potential delays. |
Cost-Effectiveness of Different Shiplap Materials
Cedar, pine, redwood, composite, and vinyl are common shiplap materials. Cedar offers superior durability and aesthetics but commands a higher price. Pine and redwood provide good value, offering a balance between cost and quality. Composite and vinyl options are generally the most budget-friendly, although their longevity and aesthetic appeal might be less than wood. For example, a 100 sq ft project using cedar might cost significantly more than the same project using vinyl. The specific price differences will vary based on the factors mentioned above.
Maintaining Exterior Shiplap Siding
Proper maintenance is crucial for extending the lifespan and preserving the aesthetic appeal of your exterior shiplap siding. Neglecting maintenance can lead to premature deterioration, costly repairs, and a diminished property value. A proactive approach, incorporating regular inspections and preventative measures, will ensure your shiplap remains a beautiful and durable feature of your home for years to come.
Regular maintenance of exterior shiplap involves a combination of preventative measures, cleaning, and repair techniques. Addressing minor issues promptly can prevent them from escalating into significant problems, saving both time and money in the long run. This section details effective strategies for keeping your shiplap siding in top condition.
Preventative Maintenance Techniques
Preventative maintenance is the cornerstone of long-lasting shiplap. By implementing these techniques, you significantly reduce the likelihood of costly repairs and extend the life of your siding.
- Annual Inspections: Conduct thorough visual inspections at least once a year, preferably in spring and fall. Check for loose boards, cracks, signs of rot or insect infestation, and any damage caused by weather. Early detection allows for timely intervention, preventing minor issues from becoming major problems.
- Caulk Regularly: Inspect and reapply caulk around windows, doors, and other areas where the shiplap meets other building materials. Caulk prevents water penetration, a major cause of damage. Choose a high-quality, exterior-grade caulk suitable for the climate and material.
- Proper Gutter Maintenance: Ensure gutters and downspouts are clean and functioning correctly to divert water away from the foundation and siding. Water pooling against the shiplap can lead to rot and damage.
- Trim Overhanging Branches: Keep tree branches and shrubs trimmed back from the house. Overhanging branches can retain moisture against the siding and provide nesting places for insects.
- Regular Painting or Staining: Depending on the type of finish, repainting or restaining every few years protects the wood from the elements and helps maintain its appearance. Follow manufacturer’s instructions for proper application and drying time.
Cleaning Exterior Shiplap Siding
Regular cleaning removes dirt, grime, and mildew, preserving the appearance and protecting the wood from damage. Different cleaning methods are suitable for various types of shiplap finishes.
- Pressure Washing: For heavily soiled shiplap, pressure washing can be effective. However, use caution to avoid damaging the wood. Use a low-pressure setting and maintain a safe distance from the surface. Test a small, inconspicuous area first to ensure the pressure doesn’t damage the finish.
- Soft Washing: A safer alternative to pressure washing, soft washing uses a low-pressure spray with a cleaning solution to remove dirt and mildew. This method is gentler on the wood and less likely to cause damage.
- Brush Cleaning: For delicate finishes or intricate detailing, a soft-bristled brush and a mild detergent solution can be used to gently clean the shiplap. Rinse thoroughly with water after cleaning.
Repairing Damaged Shiplap Siding
Prompt repair of damaged shiplap prevents further deterioration and maintains the integrity of the siding. Repair methods vary depending on the type and extent of the damage.
- Replacing Damaged Boards: If a board is severely damaged, rotten, or beyond repair, it should be replaced. This requires carefully removing the damaged board and installing a new one, ensuring proper alignment and fastening.
- Filling Cracks and Holes: Small cracks and holes can be filled with wood filler, ensuring it’s compatible with the type of wood and finish. Once the filler is dry, sand it smooth and repaint or restain the area to match the surrounding shiplap.
- Repairing Loose Boards: Loose boards can be secured by tightening existing fasteners or adding new ones. Use appropriate fasteners for the type of wood and siding.
Protecting Exterior Shiplap from Weather Damage and Pests
Protecting shiplap from the elements and pests is crucial for long-term durability. A multi-faceted approach is most effective.
- High-Quality Paint or Stain: Applying a high-quality exterior paint or stain provides a protective barrier against moisture, UV rays, and insect damage. Choose a product specifically designed for exterior wood siding.
- Insect Control: Regularly inspect for signs of insect infestation, such as holes, sawdust, or insect activity. Address infestations promptly using appropriate insecticides or pest control measures. Consult a professional pest control service if necessary.
- Moisture Management: Proper ventilation, gutter maintenance, and landscaping help to prevent moisture buildup, which can lead to rot and mold growth. Ensure adequate airflow around the house to prevent moisture from accumulating.
Transforming your home’s exterior with shiplap siding involves careful consideration of style, material, and installation. By understanding the intricacies of each element—from choosing the right profile and material to mastering the installation process and implementing preventative maintenance—you can achieve a beautiful, durable, and long-lasting result. This guide has provided the foundation; now, let your vision take shape.
FAQ Compilation
What is the lifespan of exterior shiplap?
Lifespan varies greatly depending on the material. Cedar and pine can last 15-30 years with proper maintenance, while fiber cement and vinyl can last 50 years or more.
Can I install shiplap myself?
While possible for DIY enthusiasts with experience, professional installation is often recommended, especially for large projects, to ensure proper installation and longevity.
How much does professional installation cost?
Costs vary widely based on location, material choice, project size, and labor rates. Obtain multiple quotes from reputable contractors before starting.
How often should I clean my shiplap siding?
Regular cleaning, ideally once or twice a year, using a gentle cleaner and soft brush, prevents dirt and debris buildup, maintaining its appearance and extending its lifespan.
What are some common problems with exterior shiplap?
Common issues include warping, cracking (especially with wood), and pest infestation. Regular inspection and preventative maintenance are crucial.
