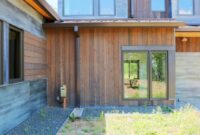
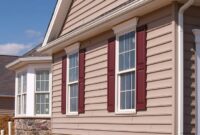
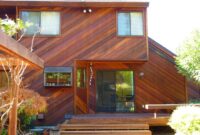
Hardie trim elevates exterior design, offering durability and aesthetic appeal unmatched by traditional materials. This comprehensive guide delves into every aspect of Hardie trim, from its diverse product offerings and straightforward installation to its long-term maintenance and considerable environmental benefits. We’ll explore the various profiles, dimensions, and applications, guiding you through the process of choosing, installing, and caring for this superior trim solution.
From understanding the manufacturing process and comparing it to alternatives to mastering installation techniques and addressing common issues, this guide provides a complete resource for homeowners, contractors, and anyone interested in learning more about this popular exterior trim option. We’ll also cover cost considerations, warranty information, and address frequently asked questions to ensure you’re fully equipped to make informed decisions.
Hardie Trim Product Overview
Hardie trim, manufactured by James Hardie, offers a durable and low-maintenance alternative to traditional wood trim. Its fiber cement composition provides superior resistance to rot, insects, and fire, making it a popular choice for exterior applications. This overview details the various types, manufacturing processes, and key benefits of Hardie trim.
Hardie Trim Types
James Hardie offers a range of trim profiles designed to complement various architectural styles. These profiles differ in their shape, size, and intended use. The most common types include: primed, pre-finished, and unprimed options. Primed trim is ready for a topcoat of paint, while pre-finished trim comes with a factory-applied coating, reducing on-site painting time. Unprimed trim allows for complete customization with your choice of paint. Specific profiles vary by region and availability.
Hardie Trim Manufacturing Process
Hardie trim’s manufacturing process begins with a blend of cement, cellulose fibers, and other additives. This mixture is then formed into the desired profile using specialized machinery. The formed pieces undergo a curing process to achieve the necessary strength and durability. Finally, the trim is either primed, pre-finished, or left unprimed, depending on the chosen product. This process results in a consistent, high-quality product resistant to the elements.
Key Features and Benefits of Hardie Trim
Compared to wood trim, Hardie trim offers several advantages. Its resistance to rot, decay, and insect infestation eliminates the need for frequent maintenance and replacement, saving both time and money. Its fire-resistant properties contribute to improved home safety. Furthermore, Hardie trim is incredibly durable, capable of withstanding harsh weather conditions without significant deterioration. The consistent finish and precise dimensions simplify installation and ensure a professional-looking result. Its long lifespan also reduces the environmental impact compared to frequently replaced wood trim.
Hardie Trim Comparison Table
| Profile | Dimensions (Approximate) | Application | Notes |
|---|---|---|---|
| Primed Square Edge | Various widths and lengths | Window and door casings, fascia boards | Requires painting on-site. |
| Pre-finished Colonial | Various widths and lengths | Window and door casings, decorative trim | Factory-applied finish reduces painting time. |
| Unprimed Scotia | Various widths and lengths | Baseboards, crown molding | Allows for complete paint customization. |
| Pre-finished Board & Batten | Various widths and lengths | Siding applications, accent walls | Provides a rustic aesthetic with factory-applied finish. |
Hardie Trim Installation Methods

Installing Hardie trim requires careful planning and execution to ensure a durable and aesthetically pleasing finish. Proper preparation and adherence to best practices are crucial for a successful installation, regardless of the underlying surface material. This section details the process for various installation scenarios and highlights key considerations for optimal results.
Tools and Equipment
A successful Hardie trim installation relies on having the right tools. Essential equipment includes a measuring tape, level, saw (circular saw with a fine-tooth blade for clean cuts is recommended), miter saw (for precise angled cuts), nail gun (using appropriate nails for the substrate), safety glasses, work gloves, caulk gun, and appropriate sealant. For cutting Hardie trim, a scoring tool can be helpful to prevent chipping. Additional tools, such as a jigsaw, may be needed depending on the complexity of the project and the shape of the trim. Always ensure your tools are sharp and in good working order for accurate and efficient cuts.
Installation on Wood
Installing Hardie trim on wood siding requires ensuring the wood is sound and properly prepared. Begin by measuring and cutting the trim pieces to the required lengths, using a miter saw for precise angles, especially at corners. Apply a bead of exterior-grade sealant to the back of the trim piece before nailing it to the wood. Space nails appropriately, following manufacturer recommendations, typically every 6-8 inches, avoiding placing nails too close to the edges to prevent splitting. Use galvanized nails or screws designed for exterior use. Ensure the trim is flush against the wood and level, using a level to check alignment.
Installation on Brick
Installing Hardie trim on brick requires a slightly different approach. Because brick is a less forgiving surface, proper preparation is vital. You may need to use furring strips or a similar system to create a level surface for the trim. These strips are attached to the brick using appropriate fasteners. Once the furring strips are securely in place and level, the Hardie trim can be installed on top, following the same nailing and sealant application procedures as for wood. Ensure that the furring strips are spaced to allow for proper ventilation and expansion and contraction of the Hardie trim.
Installation on Siding
Installation on vinyl or other types of siding follows a similar process to wood. Ensure the siding is clean and dry. Use appropriate fasteners for your siding type. Always consult the manufacturer’s instructions for your specific siding and Hardie trim product to ensure compatibility and proper installation. Consider using additional fasteners in areas subjected to high winds or other stresses.
Cutting and Mitering Hardie Trim
Precise cutting is crucial for a professional-looking finish. For straight cuts, a circular saw with a fine-tooth blade is recommended. For angled cuts (miters), a miter saw is essential for accuracy. Always score the Hardie trim before sawing to prevent chipping. When cutting, support the trim piece firmly to prevent movement and ensure a clean cut. Practice on scrap pieces before cutting final pieces to get a feel for the cutting process. Properly mitered corners are essential for a clean, professional appearance.
Common Installation Mistakes and How to Avoid Them
Prior to installation, carefully review the manufacturer’s instructions. Paying close attention to these instructions is paramount to a successful installation.
- Improper Nail Spacing: Avoid this by following manufacturer recommendations for nail spacing and using the correct fasteners.
- Using Incorrect Fasteners: Always use galvanized nails or screws designed for exterior use to prevent corrosion and ensure a secure hold.
- Neglecting Sealant: Apply a bead of exterior-grade sealant to the back of the trim and along any joints to prevent water penetration and ensure a weathertight seal.
- Inaccurate Cuts: Use a sharp blade and a miter saw for accurate angled cuts to ensure a clean, professional finish.
- Uneven Installation: Use a level frequently to ensure the trim is installed straight and level.
- Not Accounting for Expansion and Contraction: Leave appropriate expansion gaps as recommended by the manufacturer to accommodate changes in temperature and humidity.
Hardie Trim Maintenance and Care
Proper maintenance ensures your Hardie trim remains beautiful and durable for years to come. Regular cleaning and prompt attention to minor damage will significantly extend its lifespan and prevent costly repairs down the line. This section details recommended cleaning methods, repair techniques, preventative measures, and a simple maintenance schedule.
Recommended Cleaning Methods for Hardie Trim
Cleaning Hardie trim is straightforward and requires only a few simple tools and readily available cleaning solutions. Avoid abrasive cleaners or harsh chemicals that could damage the surface. A gentle approach is key to preserving the trim’s finish.
- For routine cleaning, use a soft-bristled brush or sponge and a solution of mild dish soap and water. Gently scrub the trim, rinsing thoroughly with clean water afterward. Allow the trim to air dry completely.
- For more stubborn stains, a pressure washer can be effective, but use caution. Maintain a safe distance to avoid damaging the surface. A lower pressure setting is recommended, and always test in an inconspicuous area first.
- For mildew or mold, a solution of bleach and water (typically one part bleach to three parts water) can be used. Apply the solution with a brush or sponge, let it sit for a few minutes, then scrub and rinse thoroughly. Always wear protective gloves and eye protection when handling bleach.
Repairing Minor Damage to Hardie Trim
Minor damage, such as small scratches or chips, can often be repaired easily. For more extensive damage, professional assistance may be necessary.
- For small scratches, use a fine-grit sandpaper to lightly smooth the area. Then, apply a matching color of exterior-grade paint designed for fiber cement. Allow ample drying time before reapplying if needed.
- For chips or larger damage, consider using a two-part epoxy filler designed for exterior use. Apply the filler according to the manufacturer’s instructions, ensuring a smooth finish. Once dry, sand and paint to match the existing trim.
Preventing Common Issues like Cracking or Fading
Preventing damage is always preferable to repairing it. Taking proactive steps can help maintain the integrity and appearance of your Hardie trim for many years.
- Proper installation is crucial. Ensure the trim is installed correctly according to manufacturer’s instructions, allowing for proper expansion and contraction due to temperature changes. This minimizes the risk of cracking.
- Regular cleaning helps prevent the buildup of dirt and grime that can contribute to fading. Keeping the trim clean also makes it easier to detect and address minor damage promptly.
- Protecting the trim from harsh weather conditions can help prevent fading and cracking. Consider using protective coatings or sealants specifically designed for fiber cement, especially in areas with intense sun exposure or frequent freeze-thaw cycles. Consult manufacturer recommendations for the best protection in your specific climate.
Hardie Trim Maintenance Schedule
A simple maintenance schedule can help you stay on top of cleaning and inspections, ensuring your Hardie trim remains in top condition.
| Task | Frequency |
|---|---|
| Routine Cleaning (soap and water) | Twice yearly (Spring and Fall) |
| Inspection for damage | Twice yearly (Spring and Fall) |
| Pressure washing (if needed) | Annually |
| Repair minor damage | As needed |
| Apply protective sealant (if needed) | Every 3-5 years, depending on climate and exposure |
Hardie Trim Design and Aesthetics
Hardie trim offers a remarkable blend of durability and aesthetic appeal, enhancing the curb appeal and overall architectural style of any home. Its versatility allows for seamless integration into diverse design schemes, from traditional to contemporary, while its low-maintenance nature ensures long-lasting beauty. The choice of Hardie trim significantly impacts the final look and feel of a project, making careful consideration of design elements crucial for achieving the desired aesthetic.
Hardie trim’s adaptability across various architectural styles is a key advantage.
Hardie Trim’s Versatility in Different Architectural Styles
The clean lines and crisp edges of Hardie trim complement the sleek, minimalist aesthetic of modern architecture. Imagine a contemporary home with expansive windows and a flat roof, accented by sharp, precisely mitered Hardie trim around the window frames and along the roofline. This creates a visually striking contrast between the smooth surfaces and the defined edges of the trim. Conversely, the more ornate profiles available in Hardie trim can be used to enhance the intricate detailing of traditional Victorian or Craftsman-style homes, adding depth and richness to the overall design. The material’s ability to mimic the look of wood, without the maintenance, allows for a seamless integration into various styles, preserving the character of the building while offering superior protection. For example, using a wider, more ornate profile on a colonial-style home can emphasize its historical character, while a simpler profile would suit a more modern farmhouse design.
Creative Applications of Hardie Trim in Exterior Design
Beyond its traditional role as window and door trim, Hardie trim offers opportunities for creative exterior design applications. It can be used to create striking accents around dormers, highlight architectural features like bay windows, or even define distinct zones within a larger facade. Consider using contrasting colors of Hardie trim to draw the eye to specific architectural elements. A darker trim color against lighter siding can create a dramatic effect, while lighter trim can add a subtle touch of elegance. Another interesting application involves incorporating Hardie trim into custom designs, such as creating decorative panels or creating intricate patterns around entryways. These creative uses transform Hardie trim from a mere functional element into a key design feature, adding personality and visual interest to the exterior of a building. For instance, using different profiles and angles to create a geometric pattern around a front porch would significantly enhance the aesthetic appeal.
Hardie Trim Color Options and Finishes
Hardie trim is available in a wide array of colors and finishes, allowing for extensive customization to match any design scheme. The color palette ranges from classic neutrals like white, gray, and beige to bolder shades like deep blues, greens, and reds. These colors can be applied using various finishes, including smooth, textured, and even wood-grain finishes. The choice of finish significantly influences the overall look and feel of the trim. A smooth finish provides a clean, modern aesthetic, while a textured finish adds depth and visual interest. Wood-grain finishes mimic the appearance of natural wood, offering a classic and timeless appeal. The durability of the paint ensures that the color remains vibrant and resistant to fading and chipping for years, minimizing the need for frequent repainting. Choosing a color that complements the overall exterior color scheme is crucial to achieving a cohesive and visually appealing design.
Design Considerations When Choosing Hardie Trim
Before selecting Hardie trim for a project, several crucial design considerations should be addressed. These include the architectural style of the home, the existing color palette, the desired level of visual impact, and the overall budget. The size and profile of the trim should be chosen to complement the scale of the house and the other architectural details. Overly large trim on a small house can look overwhelming, while overly small trim on a large house can appear insignificant. Matching the trim color to the siding or other exterior elements is crucial for achieving a cohesive design. However, using contrasting colors can also create a visually striking effect, but should be done strategically to avoid clashing elements. Finally, the budget will influence the choice of trim profile, color, and finish, as some options are more expensive than others. Careful planning ensures that the chosen trim enhances the architectural design without compromising the overall budget.
Hardie Trim Cost and Pricing
Choosing Hardie trim for your home improvement project offers durability and aesthetic appeal, but understanding the associated costs is crucial for budgeting. This section details the pricing of Hardie trim, compares it to alternatives, and Artikels factors influencing the overall project expense.
Hardie trim’s cost is competitive with other high-quality exterior trim options, though it typically sits at the higher end of the spectrum. This premium reflects its superior longevity, resistance to damage, and low maintenance requirements, ultimately offering long-term cost savings. However, the initial investment might be higher than alternatives like vinyl or wood.
Comparison with Alternative Trim Materials
The cost of Hardie trim varies depending on factors such as the trim profile, region, and project complexity. Generally, it’s more expensive than vinyl or PVC trim, but less expensive than high-end wood options like cedar or redwood. Vinyl and PVC are cheaper upfront, but may require more frequent replacements due to their susceptibility to damage from sun exposure and impact. Wood, while aesthetically pleasing, necessitates regular maintenance (painting, staining, sealing) and is prone to rot and insect infestation, leading to higher long-term costs. A direct price comparison is difficult without specifying the project’s exact details, but expect Hardie trim to fall between these two extremes in terms of initial outlay.
Factors Influencing Hardie Trim Installation Costs
Several factors significantly impact the overall cost of a Hardie trim installation project. These include material costs (influenced by trim profile, quantity, and regional pricing), labor costs (varying based on project size, complexity, and regional labor rates), and any additional expenses such as permits, waste disposal, and unforeseen complications. The project’s scope – a simple window trim installation versus a complete house wrap – will drastically influence the total cost.
Cost Component Breakdown
The following table provides a sample breakdown of the cost components for a medium-sized Hardie trim installation project (approximately 200 linear feet of trim). Note that these are estimates and actual costs can vary significantly based on the factors mentioned above.
| Cost Component | Estimated Cost (USD) | Percentage of Total Cost | Notes |
|---|---|---|---|
| Materials (Hardie Trim) | $1000 – $2000 | 30% – 40% | Price varies based on trim profile and quantity. |
| Labor | $1500 – $3000 | 45% – 60% | Labor costs are highly dependent on project complexity and regional rates. |
| Permits and Inspections | $100 – $300 | 3% – 9% | Permit costs vary by location and project scope. |
| Waste Disposal | $50 – $150 | 1.5% – 4.5% | This depends on the amount of waste generated. |
| Contingency (for unforeseen issues) | $200 – $500 | 6% – 15% | It’s prudent to include a contingency for unexpected problems. |
Obtaining Accurate Pricing Estimates
To obtain accurate pricing estimates for Hardie trim projects, it is essential to contact multiple reputable contractors. Provide them with detailed plans and specifications, including the type of trim, quantities, and any special requirements. Request detailed, itemized quotes that break down material, labor, and other costs. Compare quotes carefully, considering factors such as contractor experience, warranties, and references. A thorough understanding of the project scope and communication with contractors will ensure a realistic and accurate estimate.
Hardie Trim Environmental Impact
Choosing sustainable building materials is increasingly important for environmentally conscious homeowners and builders. Fiber cement siding, like Hardie Trim, offers a compelling alternative to traditional materials due to its inherent environmental benefits stemming from its composition and manufacturing process. This section details the environmental advantages of Hardie Trim, comparing it to other options and outlining its lifecycle impact.
Hardie Trim’s environmental benefits are multifaceted. Its primary component, cement, is a widely available and naturally occurring material, significantly reducing reliance on resource-intensive, rapidly depleting resources. The inclusion of cellulose fibers, often sourced from sustainably managed forests, further lessens the environmental burden associated with production. This combination results in a product with a lower embodied carbon footprint compared to some alternatives, contributing to reduced greenhouse gas emissions throughout its lifecycle.
Comparison with Other Trim Materials
The environmental impact of trim materials varies considerably. Compared to wood, Hardie Trim offers several advantages. While wood is a renewable resource, its harvesting and processing can contribute to deforestation and habitat loss. Furthermore, the longevity of wood trim is often limited by susceptibility to rot, insect infestation, and weather damage, leading to frequent replacements and increased waste. Conversely, Hardie Trim’s durability significantly extends its lifespan, reducing the need for frequent replacements and minimizing waste generation over time. Plastic trims, while durable, are derived from petroleum, a non-renewable resource, and contribute significantly to plastic pollution. They also often require substantial energy input for manufacturing and are not easily biodegradable. Metal trims, such as aluminum, have a high embodied energy associated with their extraction and processing, and their recyclability can be limited depending on the alloy composition. Therefore, Hardie Trim presents a more environmentally responsible alternative across various aspects of its life cycle.
Recyclability and Disposal Options
Hardie Trim’s recyclability and disposal methods are crucial considerations in its overall environmental impact. While not directly recyclable in the same way as some metals, the components of Hardie Trim can be repurposed or disposed of responsibly. Some regions offer demolition and construction waste recycling facilities that can process fiber cement materials. Alternatively, Hardie Trim can be disposed of in landfills, although this option should be a last resort due to the material’s permanence. The potential for future innovations in recycling technology for fiber cement products should also be considered. Proper disposal is key to minimizing its environmental impact at the end of its service life.
Sustainability Aspects of Hardie Trim Manufacturing
The manufacturing process of Hardie Trim incorporates several sustainability features. The use of readily available materials like cement and cellulose fibers reduces the demand for scarce resources. While energy is required for the manufacturing process, manufacturers are increasingly adopting energy-efficient technologies and practices to reduce their carbon footprint. Furthermore, responsible sourcing of raw materials, including sustainably harvested cellulose fibers, is crucial to the overall sustainability of Hardie Trim production. Continuous improvement in manufacturing processes and the exploration of alternative, more sustainable binding agents are ongoing areas of development within the industry.
Hardie Trim Warranty and Support

James Hardie, the manufacturer of Hardie trim products, offers warranties designed to protect homeowners and builders against defects in materials and workmanship. The specific terms and conditions vary depending on the product and region, so it’s crucial to consult the warranty document accompanying your purchase or available on the James Hardie website. Understanding the warranty details is essential for resolving any potential issues with your Hardie trim.
Understanding the warranty’s scope is key to protecting your investment. This includes knowing what is covered (e.g., manufacturing defects), what is not covered (e.g., damage from improper installation or environmental factors), and the duration of the warranty coverage. This information is readily available from James Hardie and should be reviewed thoroughly before and after installation.
Warranty Coverage Details
James Hardie warranties typically cover defects in materials and workmanship for a specified period. This often includes issues like cracking, splitting, or rotting of the trim due to manufacturing flaws. However, damage resulting from improper installation, misuse, normal wear and tear, or acts of God (e.g., hurricanes, floods) are usually excluded. Specific exclusions and limitations will be detailed in the individual product warranty. For example, some warranties may offer a limited lifetime coverage against certain defects, while others might have a shorter, specified timeframe. Always refer to your specific warranty document for precise details.
Filing a Warranty Claim
The process for filing a warranty claim generally involves contacting James Hardie directly through their customer service channels. This typically involves providing documentation such as proof of purchase, photos of the damaged trim, and a detailed description of the problem. James Hardie will then review the claim and determine whether it’s covered under the warranty. If approved, they will usually arrange for repair or replacement of the defective trim. Specific instructions and forms may be available on their website or through customer service representatives. It is advisable to document all communication and keep copies of any relevant documents.
Customer Support Resources
James Hardie provides several avenues for customer support. Their website typically includes a comprehensive FAQ section, contact information for customer service representatives, and online resources such as installation guides and troubleshooting tips. Many also offer phone support, allowing for direct communication with representatives who can answer questions and assist with warranty claims. Additionally, James Hardie may have authorized dealers or installers who can provide further support and assistance.
Frequently Asked Questions Regarding Hardie Trim Warranties
Understanding common questions about warranties can help prevent future issues. The following statements address frequently asked questions regarding Hardie trim warranties.
- Warranty Duration: The length of the warranty varies by product and may range from limited periods to lifetime coverage against certain defects.
- What is covered? The warranty typically covers defects in materials and workmanship, excluding damage caused by improper installation, misuse, or environmental factors.
- What is not covered? Damage caused by improper installation, normal wear and tear, vandalism, or acts of God are generally not covered under the warranty.
- Claim Process: Filing a claim usually involves contacting James Hardie customer service, providing proof of purchase and detailed information about the damage, and submitting supporting documentation.
- Transferability: The transferability of the warranty may vary depending on the specific terms and conditions Artikeld in the warranty document. It’s crucial to check whether the warranty is transferable to subsequent owners of the property.
Ultimately, Hardie trim presents a compelling case for itself as a superior exterior trim solution. Its blend of durability, aesthetic versatility, and environmental responsibility makes it a worthwhile investment for any project. By understanding the nuances of installation, maintenance, and cost considerations, you can confidently incorporate Hardie trim into your next project, transforming the exterior of your home with both beauty and lasting quality. This guide serves as a complete resource to assist you throughout the entire process, from initial planning to long-term care.
FAQ Section
Can Hardie trim be painted?
Yes, Hardie trim can be painted with exterior-grade paints designed for fiber cement. Proper surface preparation is crucial for optimal adhesion and longevity.
How long does Hardie trim last?
With proper installation and maintenance, Hardie trim can last for decades, significantly outperforming many alternative materials.
Is Hardie trim resistant to insects and pests?
Yes, Hardie trim is naturally resistant to termites and other wood-boring insects, reducing maintenance needs and extending its lifespan.
What is the best way to clean Hardie trim?
Regular cleaning with mild soap and water is recommended. For stubborn stains, consider using a pressure washer with caution, avoiding excessive pressure.
Does Hardie trim require special tools for installation?
While standard carpentry tools are sufficient, specialized blades for cutting fiber cement are recommended to ensure clean cuts and prevent damage to the material.
