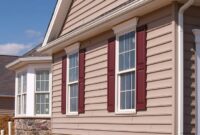
LP siding installation transforms homes, offering durability and aesthetic appeal. This guide delves into the intricacies of LP siding, from material selection and surface preparation to the installation process itself, ensuring a successful project. We’ll cover various LP siding types, comparing their costs, maintenance needs, and aesthetic qualities. Mastering the art of measuring, cutting, and fastening will be crucial, along with understanding essential safety precautions. Finally, we’ll explore cost considerations and provide a maintenance schedule to extend the life of your new siding.
This detailed walkthrough will equip you with the knowledge and confidence to tackle your LP siding installation, whether you’re a seasoned DIYer or a homeowner embarking on your first home improvement project. We’ll address common challenges, provide practical tips, and offer solutions to potential problems, making the entire process smoother and more efficient.
LP Siding Materials and Types
LP siding, manufactured by Louisiana-Pacific Corporation, offers a durable and aesthetically pleasing alternative to traditional wood siding. Understanding the different types available is crucial for choosing the best option for your home’s exterior. This section details the various LP siding options, outlining their respective advantages and disadvantages to aid in informed decision-making.
LP SmartSide Trim & Siding
LP SmartSide is engineered wood siding treated with a proprietary process to resist rot, decay, termites, and fungal attack. It’s available in a variety of profiles, including lap siding, vertical siding, and trim boards, offering considerable design flexibility. The engineered wood construction provides superior strength and dimensional stability compared to traditional wood siding, reducing warping and cracking. However, it’s generally more expensive than other siding options, and while resistant to many issues, it’s still susceptible to damage from extreme weather events and improper installation.
LP SmartSide Panel Siding
LP SmartSide panel siding offers a larger surface area per panel compared to traditional lap siding, leading to faster installation times. This can translate to cost savings on labor. The larger panels also contribute to a cleaner, more modern aesthetic. While the panels are strong and durable, they may be more prone to damage during handling and installation compared to smaller lap siding pieces. Careful handling is therefore essential to prevent surface damage.
LP SmartSide Engineered Wood Trim & Fascia
Beyond siding, LP SmartSide also produces trim and fascia boards, essential components for a complete exterior finish. These are designed to match the siding, providing a cohesive look and consistent durability. The advantages and disadvantages mirror those of the siding itself: superior resistance to rot and decay, but a higher initial cost compared to untreated wood. Proper installation is crucial to prevent water damage, which can negate the benefits of the engineered wood.
Comparison of LP Siding Types
| Property | LP SmartSide Trim & Siding | LP SmartSide Panel Siding | LP SmartSide Engineered Wood Trim & Fascia |
|---|---|---|---|
| Durability | High; resists rot, decay, termites | High; resists rot, decay, termites; requires careful handling | High; resists rot, decay, termites |
| Cost | Medium-High | Medium-High | Medium-High |
| Maintenance | Low; occasional cleaning | Low; occasional cleaning | Low; occasional cleaning |
| Aesthetics | Versatile; various profiles available | Modern, clean lines; larger panels | Matches siding for cohesive look |
LP Siding Installation Process
Installing LP siding involves a series of steps that, when followed correctly, ensure a durable and aesthetically pleasing exterior for your home. Proper preparation and attention to detail are crucial for a successful installation, minimizing potential problems and maximizing the lifespan of your siding. This section details the complete process, from initial preparation to final finishing touches.
Preparation and Planning
Before beginning installation, thorough preparation is paramount. This includes carefully measuring the area to be sided, ensuring all necessary materials are on hand, and preparing the surface of the house. This might involve removing old siding, repairing any damaged sheathing, and installing house wrap for added protection against moisture. Accurate measurements are critical to avoid waste and ensure a clean, professional-looking finish. A well-organized worksite will significantly improve efficiency and reduce the risk of errors. Furthermore, checking local building codes and obtaining any necessary permits should be completed before starting the project.
Measuring and Cutting LP Siding
Accurate measurements are essential for a seamless installation. Measure each section of the wall carefully, accounting for overlaps and any architectural features. Use a sharp utility knife or a circular saw with a fine-tooth blade to cut the LP siding to the precise dimensions. Always wear appropriate safety gear, including eye protection and gloves, during cutting. Precise cuts will minimize waste and create a professional appearance. For intricate cuts around windows or corners, consider using a jigsaw for greater control and accuracy.
Fastening LP Siding
LP siding is typically fastened using galvanized nails or screws, depending on the specific type of siding and manufacturer recommendations. Nails should be driven straight and flush with the surface of the siding, avoiding countersinking or dimpling. Spacing between fasteners should adhere to the manufacturer’s guidelines. Incorrect fastening can lead to warping, buckling, or other issues. Using the recommended fasteners and following the spacing guidelines will help ensure a secure and long-lasting installation. Pre-drilling pilot holes can be beneficial, especially for harder LP siding types or in areas prone to splitting.
Finishing Touches
Once the siding is installed, caulk all seams and joints to prevent water infiltration. Use a high-quality exterior-grade caulk that is compatible with LP siding. Proper caulking is crucial for maintaining the integrity of the siding and preventing damage from moisture. Inspect the entire installation for any gaps, loose fasteners, or damaged panels. Address any issues promptly to prevent future problems. Finally, clean up the work area, removing any debris or leftover materials.
Essential Tools and Equipment
Proper tools are crucial for a successful LP siding installation. A well-equipped installer will significantly improve efficiency and ensure quality workmanship. The following list details essential tools and equipment.
- Measuring tape
- Level
- Utility knife
- Circular saw with fine-tooth blade
- Jigsaw (for intricate cuts)
- Hammer or nail gun
- Galvanized nails or screws
- Caulk gun
- Exterior-grade caulk
- Safety glasses
- Work gloves
- Ladder (if necessary)
- Scaffolding (for taller buildings)
Preparing the Surface for LP Siding Installation
Proper surface preparation is paramount to a successful and long-lasting LP siding installation. Neglecting this crucial step can lead to issues such as uneven siding, premature failure, and compromised aesthetics. A well-prepared surface ensures the siding adheres correctly, maximizing its lifespan and performance. This involves assessing the existing surface, addressing any imperfections, and creating a stable and clean base for the new siding.
Preparing different surfaces requires tailored approaches. The material of the underlying wall—whether wood, concrete, brick, or another material—significantly influences the preparation process. Each material presents unique challenges and necessitates specific techniques to achieve a suitable substrate for LP siding. Failing to address these differences can compromise the integrity of the installation.
Surface Preparation for Wood Substrates
Wood substrates require careful inspection for rot, decay, insect infestation, and loose or damaged boards. Rotten or severely damaged areas must be completely removed and replaced with sound lumber. Loose boards should be securely fastened, ensuring a stable base. All surfaces should be cleaned to remove dirt, debris, and loose paint. Existing paint should be sound and firmly adhered; peeling or flaking paint must be scraped and sanded smooth. Any significant gaps or cracks should be filled with appropriate wood filler and sanded smooth to create a level surface. The final step involves treating the wood with a suitable primer to promote adhesion and prevent moisture absorption.
Surface Preparation for Concrete Substrates
Concrete surfaces often require addressing cracks, holes, and other imperfections. Cracks should be filled with a high-quality, exterior-grade patching compound suitable for concrete. Larger holes may necessitate the use of expanding foam followed by patching. The surface should be thoroughly cleaned to remove loose debris, dirt, and efflorescence (a white, powdery deposit). A coat of concrete primer is crucial to ensure proper adhesion of the LP siding and to prevent moisture penetration. Uneven surfaces might need to be leveled with a suitable patching compound before priming. Remember that concrete is a porous material, and proper sealing is essential.
Surface Preparation for Brick Substrates
Brick surfaces typically require less extensive preparation than wood or concrete. However, loose mortar should be removed and repointed. Cracks and holes should be filled with a suitable mortar mix, ensuring a smooth, even surface. The brick surface should be cleaned thoroughly to remove dirt, debris, and loose mortar. A specialized brick primer is often recommended to improve adhesion and protect the brick from moisture. While brick is generally durable, inspecting for loose or damaged bricks and addressing them appropriately is vital. Significant surface imperfections might require the use of a leveling compound to ensure a smooth and even surface before siding installation.
Identifying and Addressing Common Surface Imperfections
Visual inspection is key to identifying surface imperfections. Cracks, gaps, holes, and loose materials are common issues. Cracks in wood or concrete can be filled with appropriate fillers. Gaps can be filled with expanding foam or caulking. Holes require filling with appropriate materials, depending on the size and substrate. Loose materials, such as peeling paint or loose bricks, must be removed before proceeding with the installation. A visual description might include images showing cracked wood, loose mortar, holes in concrete, and peeling paint; these imperfections must be addressed before installing LP siding to ensure a successful and lasting installation. For example, a significant crack in a wooden wall could look like a jagged line running several inches, while loose mortar might appear as crumbling material between bricks. Properly addressing these issues, including using appropriate fillers and ensuring proper adhesion, is crucial for long-term siding performance.
Cutting and Measuring LP Siding: Lp Siding Installation
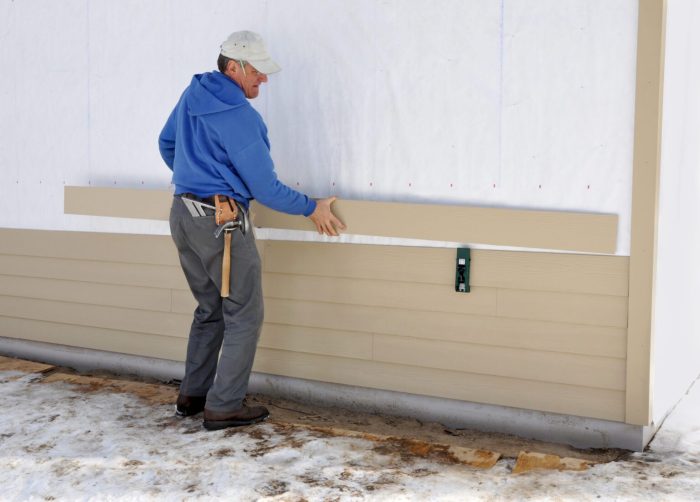
Precise cutting and measuring are crucial for a professional-looking and efficient LP siding installation. Inaccurate cuts lead to wasted materials, gaps in the siding, and an overall unprofessional appearance. This section details techniques for achieving accurate cuts and minimizing material waste.
Accurate measurement and cutting of LP siding requires careful planning and the right tools. The material’s properties, such as its tendency to splinter, need to be considered when choosing a cutting method. Proper techniques ensure clean cuts and prevent damage to the siding.
Cutting Techniques for LP Siding
Several methods exist for cutting LP siding, each with its advantages and disadvantages. The choice depends on the cut’s complexity and the tools available.
Circular saws offer speed and efficiency for straight cuts, particularly when cutting multiple pieces of the same length. A fine-toothed blade specifically designed for cutting wood is essential to minimize splintering. Before cutting, secure the siding firmly to prevent movement. A steady hand and controlled speed are crucial for a clean cut. Using a guide, such as a straight edge clamped to the siding, ensures accuracy.
Hand saws, while slower, provide more control for intricate cuts and curved shapes. A sharp blade is paramount to avoid tearing or splintering. Employing a backer board underneath the siding during cutting helps prevent damage to the material’s surface. For curved cuts, a coping saw or jigsaw may be more appropriate. These tools allow for precise maneuvering around corners and other complex shapes.
Measuring and Cutting LP Siding for Various Areas
Accurately measuring and cutting LP siding for different areas requires understanding the dimensions of the area to be covered and accounting for overlaps and joints.
For example, when siding a wall, measure the wall’s height and width. Then, consider the overlap required for proper installation – usually a specified amount by the manufacturer. Subtract the overlap from the total measurement to determine the length of the siding needed. Mark the cut line with a pencil and use a straightedge to ensure accuracy. For corners, measure the length of each side and cut the siding to fit, ensuring a tight and weatherproof seal. Pre-drilling pilot holes before fastening reduces the risk of splitting the siding. Always measure twice and cut once to avoid costly mistakes.
Tips for Minimizing Waste and Ensuring Precise Cuts
Careful planning and execution are key to minimizing waste during LP siding installation.
Before cutting, create a detailed layout of the siding panels, optimizing their placement to minimize waste. Use scrap pieces for practice cuts to refine your technique before working with the final panels. Measure twice, and then cut once. Utilize leftover pieces for smaller areas or trim, wherever possible. When dealing with complex cuts, create templates from cardboard to ensure consistent and accurate cuts. Storing leftover siding in a dry, protected area will ensure they can be reused in the future. Finally, always double-check measurements before cutting to prevent errors and material waste.
Fastening and Securing LP Siding
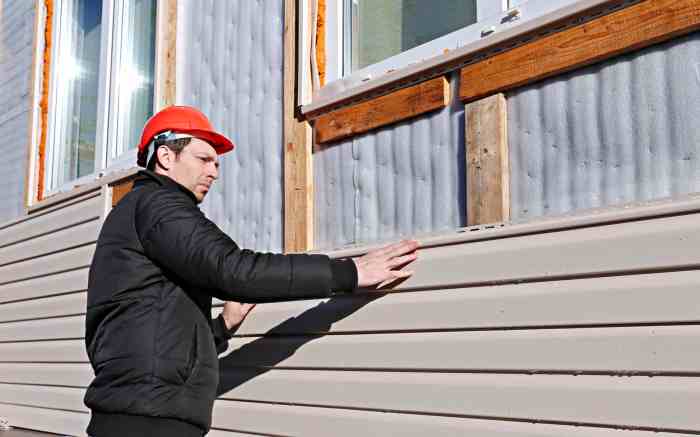
Proper fastening is crucial for the longevity and structural integrity of your LP siding installation. Incorrect fastening can lead to issues such as warping, cracking, and premature failure of the siding. This section details the appropriate methods, fasteners, and spacing requirements for a successful installation.
The process of fastening LP siding involves securely attaching the panels to the underlying sheathing or framing using appropriate fasteners. The choice of fastener and the method of application will depend on several factors, including the type of siding being installed, the climate, and the specific building code requirements. Consistent and accurate fastening is essential to ensure a weathertight and aesthetically pleasing finish.
Fastener Types and Applications
LP siding installations typically utilize galvanized nails or screws, chosen for their corrosion resistance and ability to withstand the stresses of wind and weather. Galvanized nails are generally preferred for their ease of use and cost-effectiveness, particularly for standard lap siding. However, screws offer superior holding power and are often recommended for applications where increased strength is required, such as in high-wind areas or with larger siding panels. The length of the fastener is critical; it should penetrate the siding and securely fasten into the underlying structural sheathing, typically a minimum of 1 1/4 inches, but always refer to the manufacturer’s specifications for your specific LP siding product. Using too short a fastener risks inadequate hold, while excessively long fasteners can damage the sheathing or even penetrate through to the interior.
Fastener Spacing and Alignment
Maintaining consistent spacing between fasteners is paramount for preventing warping and buckling of the siding. Overly close spacing can lead to stress concentrations, while overly spaced fasteners can compromise the structural integrity of the siding. Manufacturer’s instructions will provide recommended fastener spacing, which should be meticulously followed. Typically, this involves spacing fasteners every 6 to 8 inches along the top and bottom edges of the siding panels, with additional fasteners placed near any cut edges or joints. Fasteners should be driven straight and flush with the surface of the siding to prevent damage and maintain a clean, even appearance. Misaligned fasteners can create stress points, potentially leading to cracking or warping. Using a nail gun with a depth adjustment feature helps ensure consistent fastener penetration and reduces the risk of damage.
Addressing Specific Siding Types
Different LP siding products might have specific fastening requirements. For instance, LP SmartSide engineered wood siding often necessitates different fastener spacing compared to other LP siding products. Always consult the manufacturer’s installation guide for precise instructions pertaining to the specific LP siding being installed. Failure to follow these instructions may void any warranty claims. These instructions usually include diagrams illustrating proper fastener placement and spacing for various scenarios, such as corners, edges, and around windows and doors.
Finishing Touches and Maintenance
Proper finishing touches are crucial for ensuring the longevity and aesthetic appeal of your LP siding installation. These final steps protect your investment and contribute to a professional-looking finish. Overlooking these details can lead to premature wear and tear, compromising the structural integrity and visual appeal of your siding.
Caulking and Sealing
Caulking is essential for sealing gaps and cracks around windows, doors, and other penetrations in the siding. This prevents water intrusion, which is a major cause of damage to LP siding. High-quality, paintable caulk should be used, ensuring a weathertight seal. The caulk should be applied smoothly and neatly, avoiding excessive buildup. Properly caulked joints contribute significantly to the overall durability of the siding system. After caulking, allow sufficient drying time before painting. Sealing is equally important for protecting the edges and ends of the siding panels. This prevents moisture absorption and subsequent swelling or warping. End caps or appropriate sealant should be applied according to the manufacturer’s instructions. A thorough sealing process safeguards the long-term performance of the siding.
Painting and Finishing
Painting LP siding provides an additional layer of protection against the elements and enhances its aesthetic appeal. Choose high-quality exterior paint designed for siding applications. Before painting, ensure the siding is clean and dry. Apply multiple coats of paint for optimal coverage and durability. Proper preparation and application techniques, such as priming, will ensure a smooth, long-lasting finish. Different paint types, such as acrylic latex or oil-based paints, offer varying degrees of durability and UV protection, influencing the overall lifespan of the paint job and the siding itself. Consider the climate and expected exposure to sunlight when selecting the appropriate paint.
LP Siding Maintenance Schedule
Regular maintenance is key to preserving the beauty and structural integrity of your LP siding. A proactive approach can prevent costly repairs and extend the lifespan of your siding significantly.
- Annual Inspection: Conduct a thorough visual inspection at least once a year, checking for loose or damaged siding, caulking, and paint. Pay close attention to areas prone to water damage, such as around windows and doors.
- Cleaning: Clean your siding at least twice a year using a soft-bristled brush and a mild detergent solution. Power washing can be used cautiously, but avoid using excessive pressure, which can damage the siding. Regular cleaning removes dirt, grime, and mold, maintaining the siding’s appearance and preventing deterioration.
- Caulk Repair: Inspect and repair any damaged or cracked caulking promptly. This prevents water from penetrating the siding and causing damage.
- Paint Touch-ups: Address any chipped or faded paint promptly. Regular touch-ups help maintain the siding’s appearance and protect it from the elements. A full repaint may be needed every 5-10 years depending on the paint type and environmental conditions.
Common LP Siding Problems and Solutions
Understanding common LP siding problems and their solutions is essential for effective maintenance. Early detection and prompt action can prevent minor issues from escalating into major repairs.
- Water Damage: Caused by inadequate caulking, damaged siding, or improper installation. Solutions include repairing or replacing damaged siding, recaulking, and addressing any underlying water intrusion problems.
- Mold and Mildew: Develops in damp conditions. Solutions include cleaning the siding with a suitable cleaning solution and ensuring proper ventilation to prevent future growth. Regular cleaning is a proactive measure to prevent the build-up of mold and mildew.
- Cracked or Damaged Siding: Caused by impact or weathering. Solutions include repairing or replacing the damaged section of siding. For significant damage, professional assistance might be necessary.
- Loose or Failing Fasteners: Can lead to sagging or damaged siding. Solutions involve tightening or replacing loose fasteners. This preventative measure is crucial for maintaining the structural integrity of the siding system.
Safety Precautions During LP Siding Installation
LP siding installation, while a relatively straightforward process, presents several potential safety hazards. Ignoring these risks can lead to serious injuries. This section details crucial safety precautions to ensure a safe and successful installation. Adherence to these guidelines is paramount for both the installer and those in the vicinity.
Potential Hazards During LP Siding Installation
Working at heights, handling sharp materials, and operating power tools all contribute to the inherent risks of LP siding installation. Falls from ladders or scaffolding are a significant concern, particularly on multi-story buildings. Cuts and punctures from sharp siding edges or nails are also common. Furthermore, the use of power tools like circular saws and nail guns necessitates careful handling to avoid injuries. Exposure to the elements, such as sun and heat, can also lead to heat exhaustion or dehydration.
Safety Guidelines for LP Siding Installation
Mitigating risks during LP siding installation requires a proactive approach. This includes proper planning, the use of appropriate safety equipment, and adherence to best practices. Regular inspections of equipment and work areas are also vital for preventing accidents.
Safety Checklist for LP Siding Installation
Always use a stable and properly secured ladder or scaffolding that extends at least 3 feet above the roofline.
Wear appropriate personal protective equipment (PPE), including safety glasses, gloves, and hearing protection.
Use caution when handling sharp materials; wear cut-resistant gloves and handle siding carefully to avoid cuts.
Inspect power tools before use and ensure they are in good working order. Disconnect power before making any adjustments.
Follow the manufacturer’s instructions for the proper use and maintenance of power tools.
Use a nail gun with the appropriate safety features, such as a contact safety mechanism to prevent accidental firing.
Maintain a clean and organized work area to prevent trips and falls. Clear debris regularly.
Take regular breaks to avoid heat exhaustion or dehydration, especially in hot weather. Stay hydrated by drinking plenty of water.
Be aware of overhead power lines and other potential hazards before beginning work. Maintain a safe distance.
Work with a partner whenever possible, especially when working at heights or with power tools.
Never rush the job. Take your time and focus on safe practices.
Cost Considerations for LP Siding Installation
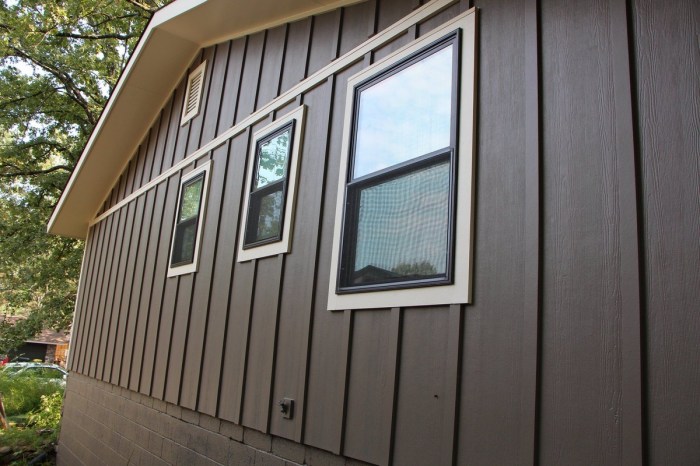
The total cost of LP siding installation is influenced by a variety of factors, making accurate prediction challenging without a detailed project assessment. Understanding these variables allows for better budgeting and informed decision-making. This section details the key cost drivers and provides a sample cost breakdown to illustrate typical expenses.
Factors Influencing LP Siding Installation Costs
Several key factors significantly impact the overall cost of an LP siding project. These include the size of the area to be sided, the chosen LP siding type and its associated material costs, the complexity of the installation (e.g., intricate designs or difficult-to-access areas), labor rates in the region, and the need for permits and inspections. The condition of the existing wall surface also plays a role, as extensive repairs or preparation may add considerable expense. Furthermore, regional variations in material pricing and labor costs can create significant differences in the final project cost.
LP Siding Type and Installation Method Cost Comparison
Different LP siding types, such as SmartSide engineered wood siding, have varying material costs. For example, premium options with enhanced durability or specific aesthetic features generally command higher prices. Similarly, the chosen installation method influences costs. A more complex installation, such as one involving intricate trim work or extensive cutting, will naturally be more expensive than a straightforward installation on a simple structure. While precise cost comparisons are difficult without specific project details, it’s generally understood that more complex installations using higher-end siding products will result in a higher total cost.
Sample Cost Breakdown for LP Siding Installation
The following table provides a sample cost breakdown for a hypothetical 1,000 square foot LP siding installation project. These figures are estimates and can vary based on location, materials, and labor costs. Always obtain multiple quotes from reputable contractors to ensure accurate pricing for your specific project.
| Item | Quantity | Unit Cost | Total Cost |
|---|---|---|---|
| LP SmartSide Siding (material) | 1000 sq ft | $3.50/sq ft | $3500 |
| Underlayment/Sheathing | 1000 sq ft | $1.00/sq ft | $1000 |
| Fasteners, Caulk, and Trim | $500 | ||
| Labor (Installation) | $50/hour (estimated 40 hours) | $2000 | |
| Permits and Inspections | $200 | ||
| Total Estimated Cost | $7200 |
Successfully installing LP siding elevates your home’s curb appeal and protects it from the elements for years to come. By following the steps Artikeld in this guide, paying close attention to detail, and prioritizing safety, you can achieve a professional-looking finish. Remember that proper preparation and meticulous execution are key to a long-lasting, beautiful result. Regular maintenance, as detailed, will further enhance the lifespan of your investment. Now, go forth and transform your home!
Top FAQs
Can I install LP siding over existing siding?
Often, but it depends on the condition of the existing siding. Inspect for rot, damage, and ensure proper ventilation before proceeding. Consult a professional if unsure.
What is the best time of year to install LP siding?
Spring or fall, when temperatures are moderate and the risk of extreme heat or cold is minimized, are ideal. Avoid extreme weather conditions.
How long does LP siding installation typically take?
The time varies significantly based on the size of the project and experience level. Smaller projects might take a weekend, while larger ones can take several days or even weeks.
What type of warranty comes with LP siding?
LP siding comes with manufacturer warranties, varying by product. Check the specific warranty details for your chosen siding type.
Do I need permits for LP siding installation?
Permit requirements vary by location. Check with your local building department before starting the project.
