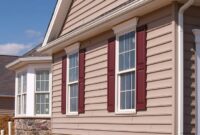
LP SmartSide installation is more than just slapping up siding; it’s about creating a durable, attractive, and long-lasting exterior for your home. This guide dives deep into every aspect of the process, from choosing the right panels and understanding the necessary tools to mastering the installation techniques and ensuring proper maintenance. We’ll cover everything from tackling tricky corners to understanding building codes and safety precautions, equipping you with the knowledge to achieve a professional-looking finish.
Whether you’re a seasoned DIYer or a first-time installer, this comprehensive resource will walk you through each step, providing clear instructions, helpful tips, and solutions to common challenges. We’ll explore the advantages of LP SmartSide over other siding materials, compare different installation methods, and address potential problems head-on. Get ready to transform your home’s exterior with confidence.
LP SmartSide Product Overview
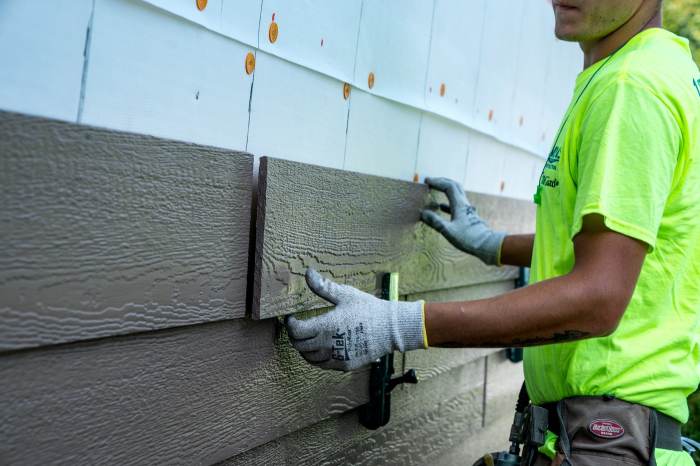
LP SmartSide engineered wood siding offers a durable and aesthetically pleasing alternative to traditional wood and vinyl siding options. Its engineered composition provides enhanced resistance to rot, insects, and moisture damage, making it a popular choice for homeowners and builders alike. This overview details the various types, advantages, disadvantages, specifications, and a comparison to competitor products.
LP SmartSide Siding Types
LP SmartSide offers a range of siding profiles designed to complement various architectural styles. These include lap siding, panel siding, and trim and fascia boards. Lap siding, the most common type, mimics the look of traditional wood clapboard, offering a classic and versatile aesthetic. Panel siding provides a cleaner, more modern look, often used for larger expanses of wall space. Trim and fascia boards are used to finish edges and corners, providing a crisp and professional look. Each type is available in a variety of colors and textures to suit diverse preferences.
Advantages and Disadvantages of LP SmartSide
LP SmartSide boasts several advantages over other siding materials. Its engineered wood construction provides superior resistance to rot, decay, and insect infestation compared to traditional wood siding. It also offers greater durability and impact resistance than vinyl siding. The variety of colors and profiles allows for customization to suit various architectural styles. However, LP SmartSide is generally more expensive than vinyl siding and can be more susceptible to damage from extreme weather conditions than some other materials like fiber cement. Proper installation and maintenance are crucial to maximize its lifespan and aesthetic appeal.
LP SmartSide Specifications
The specific dimensions and weight of LP SmartSide siding vary depending on the profile and thickness. However, general specifications include thicknesses ranging from 5/16″ to 7/16″, with varying widths depending on the profile chosen. Weight per square foot also varies but generally falls within a reasonable range for easy handling and installation. LP SmartSide carries a comprehensive warranty that typically covers defects in materials and workmanship for a period of 5 to 30 years, depending on the specific product and application. Consult the manufacturer’s website or product literature for the most up-to-date warranty information.
LP SmartSide Compared to Competitor Products
| Feature | LP SmartSide | Vinyl Siding | Fiber Cement Siding |
|---|---|---|---|
| Cost | Medium | Low | High |
| Durability | High | Medium | High |
| Aesthetics | High (versatile options) | Medium (limited textures) | High (realistic wood grain options) |
| Maintenance | Low | Low | Low |
LP SmartSide Installation Techniques
Successful LP SmartSide installation hinges on meticulous preparation and adherence to best practices. Proper techniques ensure a durable, aesthetically pleasing, and long-lasting exterior finish. This section details the necessary tools, step-by-step installation process, and crucial considerations for ventilation and water management.
Required Tools and Equipment
Professional LP SmartSide installation requires a comprehensive set of tools and equipment. This ensures efficiency, accuracy, and a high-quality finish. The specific tools might vary slightly depending on the project’s complexity and the installer’s preferences, but a standard kit typically includes: measuring tapes, levels, chalk lines, circular saws with fine-tooth blades, jigsaws for intricate cuts, nail guns (specifically designed for LP SmartSide), hammers, safety glasses, work gloves, and a variety of fasteners appropriate for the siding type and substrate. Additionally, scaffolding or ladders may be necessary for reaching higher areas, and a utility knife will be helpful for trimming and detailed work. Finally, a quality caulk gun and appropriate sealant are essential for weatherproofing.
Step-by-Step LP SmartSide Installation Process
Prior to beginning installation, ensure the sheathing is properly prepared and any necessary repairs are completed. The following steps Artikel a typical installation procedure:
- Preparation: Inspect the wall surface for any damage or imperfections. Repair any issues, ensuring a smooth and level surface for siding installation. Establish a consistent starting point, using a chalk line to mark the first row of siding. Consider using starter strips for a clean and aligned beginning.
- Measuring and Cutting: Accurately measure the length of each siding piece required, accounting for overlaps and cuts around windows and doors. Use a circular saw or jigsaw to make precise cuts, ensuring clean edges for a professional finish. Always cut on the backside to avoid splintering.
- Fastening: Secure the LP SmartSide siding to the wall using appropriate fasteners, following the manufacturer’s recommendations for spacing and penetration depth. Consistent fastening is critical for preventing warping and ensuring a secure installation. Use a nail gun for efficiency and accuracy.
- Installing Around Windows and Doors: Carefully measure and cut the siding to fit snugly around windows and doors. Use jigsaws or utility knives for precise cuts, and utilize trim pieces as needed to create a neat and weathertight seal. Consider using flashing to prevent water intrusion.
- Finishing: Once all siding is installed, inspect for any gaps or inconsistencies. Apply caulk to seal any gaps or joints to ensure a watertight seal. Clean up any debris or excess materials.
Ventilation and Water Management Best Practices
Proper ventilation and water management are critical for preventing moisture buildup and ensuring the longevity of the LP SmartSide siding. Adequate ventilation behind the siding prevents moisture from becoming trapped, which can lead to rot and damage. This is typically achieved through proper sheathing installation and the use of vented soffits and ridge vents. Furthermore, installing flashing around windows, doors, and other penetrations is crucial for diverting water away from the siding and preventing water intrusion. Properly sealed joints and consistent caulking are also essential for maintaining a weathertight barrier.
Installing LP SmartSide Around Windows and Doors: Specific Techniques
Several methods exist for installing LP SmartSide around windows and doors, each offering varying levels of complexity and aesthetic appeal. One common method involves using J-channel to create a neat and clean transition between the siding and window or door trim. Alternatively, some installers opt for using pre-fabricated trim pieces designed specifically for LP SmartSide, offering a streamlined installation process. Regardless of the chosen method, careful measurement and precise cutting are paramount to ensure a tight, weatherproof fit. Remember to always use appropriate flashing to prevent water intrusion behind the trim.
Addressing Common Installation Challenges
LP SmartSide siding, while durable and attractive, presents certain installation challenges. Understanding these potential problems and implementing effective solutions is crucial for achieving a professional, long-lasting finish. This section details common issues, their solutions, and techniques for handling difficult areas and repairing damaged panels.
Corner and Angle Installation, Lp smartside installation
Properly installing LP SmartSide around corners and angles requires precision and attention to detail. Improper cuts or inadequate fastening can lead to gaps, leaks, and an unprofessional appearance. To mitigate these issues, pre-plan cuts meticulously, using a sharp utility knife or circular saw with a fine-tooth blade for accurate cuts. For inside corners, miter cuts are generally preferred, ensuring a tight, seamless fit. Outside corners often benefit from using pre-fabricated corner trim or carefully overlapping panels with sufficient overlap to ensure weather resistance. Always use appropriate fasteners, driving them straight to avoid splitting the siding. Using a caulking gun to seal the joints further enhances weather protection.
Intersections and Transitions
Seamless transitions between different siding materials or architectural features are vital for a cohesive and aesthetically pleasing result. Careful planning and precise cuts are essential when working with windows, doors, and other architectural elements. Using flashing and caulking around these intersections prevents water intrusion. Consider using trim pieces specifically designed for these transitions to create a clean, professional finish. For example, J-channel can be used to neatly finish the edges around windows and doors.
Repairing Damaged LP SmartSide Panels
Despite its durability, LP SmartSide can be susceptible to damage during handling or installation. Minor scratches or dents can often be repaired with a putty designed for exterior siding. Allow the putty to dry completely and then sand it smooth before painting to match the existing siding color. For more significant damage, such as cracks or deep gouges, replacement of the affected panel is generally the best solution. This ensures the integrity of the siding system and prevents future problems. Remember to always follow the manufacturer’s recommendations for repair and replacement.
Troubleshooting Guide for Common LP SmartSide Installation Problems
A proactive approach to troubleshooting can save time and effort. This table provides a quick reference for common issues and their solutions.
| Problem | Cause | Solution | Visual Aid Description |
|---|---|---|---|
| Gaps between panels | Improper cuts, inadequate fastening, expansion and contraction | Recut panels, add additional fasteners, use appropriate expansion gaps | Image depicting gaps between panels versus tightly fitted panels. |
| Splitting of panels | Using incorrect fasteners, driving fasteners too close to the edge | Use appropriate fasteners, maintain proper fastener spacing | Image showing proper fastener placement and spacing versus placement too close to the edge. |
| Water penetration | Improper caulking, gaps around windows/doors | Apply sealant, install flashing appropriately | Image showcasing correct flashing installation around a window. |
| Uneven siding | Improper installation of furring strips, uneven wall surface | Ensure a level surface, use appropriate furring strips | Image comparing a properly leveled wall with furring strips and a wall with uneven siding. |
Safety Precautions and Regulations
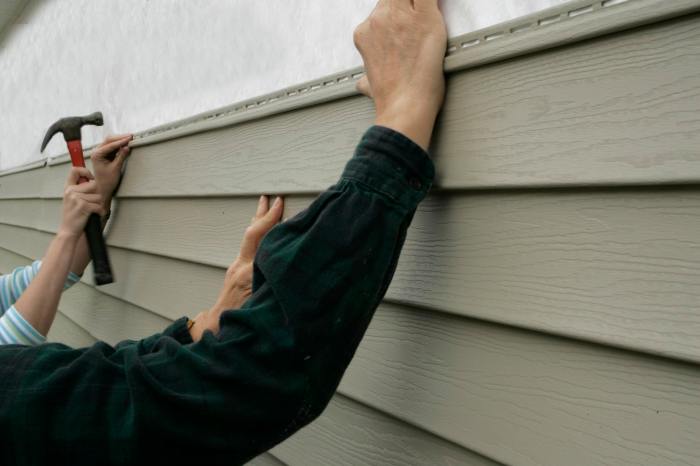
Safe and compliant installation of LP SmartSide siding is paramount for both the installer’s well-being and the structural integrity of the building. This section details essential safety measures, relevant regulations, and necessary precautions to ensure a successful and hazard-free installation process. Adherence to these guidelines is crucial for preventing accidents and ensuring the longevity of the siding.
Necessary Personal Protective Equipment (PPE)
Appropriate personal protective equipment is essential for mitigating risks during LP SmartSide installation. Failure to wear the correct PPE can lead to serious injuries. The following items are considered mandatory:
- Safety glasses or goggles: Protect eyes from flying debris, sawdust, and chemical splashes.
- Hearing protection: Reduce exposure to loud noises generated by power tools.
- Work gloves: Protect hands from cuts, splinters, and abrasions.
- Dust mask or respirator: Prevent inhalation of wood dust and other airborne particles.
- Safety harness and fall protection: Essential when working at heights.
- Steel-toed boots: Protect feet from dropped objects and heavy materials.
Potential Hazards and Mitigation Strategies
Several potential hazards exist during LP SmartSide installation. Understanding these hazards and implementing appropriate mitigation strategies is vital for a safe work environment.
- Falls from heights: Use appropriate fall protection equipment such as safety harnesses and guardrails when working on ladders or scaffolding. Ensure ladders are properly secured and positioned.
- Cuts and lacerations: Handle sharp tools and materials with care. Use appropriate cutting tools and techniques. Wear work gloves at all times.
- Exposure to hazardous materials: Follow the manufacturer’s instructions for handling and disposing of any chemicals used during the installation process. Ensure adequate ventilation to minimize exposure to fumes.
- Eye injuries: Always wear safety glasses or goggles to protect against flying debris.
- Hearing loss: Use hearing protection when operating power tools. Take regular breaks to allow your ears to rest.
Relevant Building Codes and Regulations
LP SmartSide installation must comply with all applicable local, state, and national building codes. These codes often specify requirements related to fastener type, spacing, and installation techniques to ensure structural integrity and weather resistance. Consult your local building department for specific requirements in your area. Commonly referenced codes include the International Building Code (IBC) and local amendments. Failure to comply with these regulations may result in building code violations and potential legal ramifications.
Safety Checklist
A comprehensive safety checklist is crucial for ensuring a safe and efficient installation. This checklist should be followed before, during, and after the installation process.
Before Installation:
- Inspect the work area for potential hazards.
- Ensure all necessary PPE is available and in good condition.
- Review the LP SmartSide installation instructions and building codes.
- Inspect tools and equipment for proper function and safety.
- Communicate the safety plan to all team members.
During Installation:
- Use appropriate fall protection when working at heights.
- Handle tools and materials carefully to avoid cuts and injuries.
- Maintain a clean and organized work area.
- Take regular breaks to avoid fatigue.
- Report any injuries or unsafe conditions immediately.
After Installation:
- Inspect the completed work for any safety hazards.
- Properly dispose of waste materials according to local regulations.
- Clean the work area thoroughly.
- Document all safety procedures followed.
Maintenance and Longevity
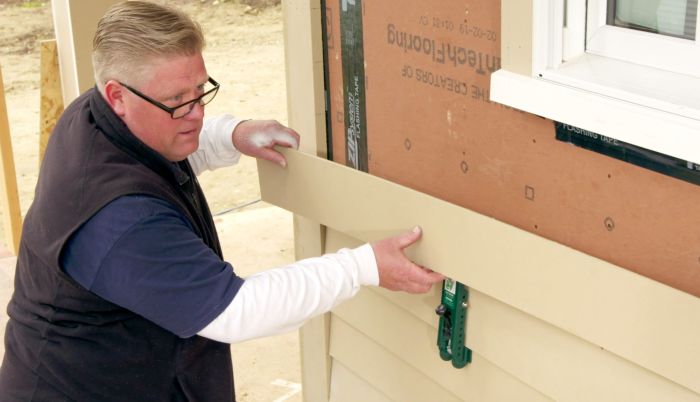
Proper maintenance is crucial for maximizing the lifespan and aesthetic appeal of your LP SmartSide siding. Regular cleaning and attention to detail can prevent damage and preserve the investment you’ve made in your home’s exterior. This section Artikels recommended practices to ensure your LP SmartSide siding remains beautiful and durable for years to come.
Recommended Maintenance Practices
Maintaining your LP SmartSide siding involves a combination of regular cleaning and occasional inspections. These practices help prevent the accumulation of dirt, debris, and potential damage, extending the life of your siding significantly. Consistent care minimizes the need for extensive repairs down the line.
Cleaning and Care Procedures
Regular cleaning removes dirt, mildew, and other contaminants that can degrade the siding’s surface and compromise its protective qualities. A simple solution of mild detergent and water, applied with a soft-bristled brush or sponge, is generally sufficient. For stubborn stains, a pressure washer can be used, but care should be taken to avoid damaging the siding’s surface by maintaining a safe distance and using a low-pressure setting. Always rinse thoroughly with clean water after cleaning.
Expected Lifespan Under Varying Conditions
The lifespan of LP SmartSide siding is influenced by several factors, including climate, exposure to sunlight, and the frequency of maintenance. In moderate climates with minimal exposure to harsh weather, LP SmartSide siding can be expected to last for several decades. However, in areas with extreme temperature fluctuations, high humidity, or frequent exposure to strong winds and heavy precipitation, the lifespan might be slightly shorter. Regular maintenance significantly mitigates the impact of these environmental factors. For example, a home in a consistently dry, sunny climate might see its LP SmartSide last 40+ years with proper maintenance, while a coastal home facing frequent storms might see a slightly reduced lifespan, though still likely exceeding 25 years with diligent care.
Routine Maintenance Schedule
Regular maintenance is key to preserving the appearance and integrity of your LP SmartSide siding. The following table Artikels a suggested schedule for routine maintenance tasks:
| Task | Frequency | Description | Notes |
|---|---|---|---|
| Visual Inspection | Annually | Check for damage, loose panels, or signs of deterioration. | Address any issues promptly. |
| Cleaning | Semi-annually | Clean siding with mild detergent and water. | Use a soft-bristled brush or sponge; avoid harsh chemicals. |
| Pressure Washing (if needed) | Every 2-3 years | Remove stubborn dirt and mildew with a low-pressure setting. | Maintain a safe distance from the siding to avoid damage. |
| Repair/Replacement | As needed | Repair or replace damaged panels promptly. | Contact a professional if necessary. |
Preventing Common Issues
Proactive measures can significantly reduce the risk of common problems associated with LP SmartSide siding. Addressing these issues promptly can prevent extensive and costly repairs.
- Mold Growth Prevention: Regular cleaning and ensuring proper ventilation around the house helps prevent mold growth. Promptly addressing any signs of moisture buildup is crucial.
- Water Damage Prevention: Ensure proper flashing and caulking around windows and doors to prevent water penetration. Regularly inspect and repair any damaged caulking or flashing.
- Insect Infestation Prevention: Regularly inspect for any signs of insect activity and address infestations promptly. Maintaining a clean and well-ventilated area around the house can help deter insects.
Mastering LP SmartSide installation opens the door to a beautiful and resilient home exterior. By following the steps Artikeld in this guide, paying close attention to detail, and prioritizing safety, you can achieve a professional-looking result that will stand the test of time. Remember, proper preparation, careful execution, and regular maintenance are key to maximizing the longevity and aesthetic appeal of your LP SmartSide siding. With the right knowledge and approach, you can confidently tackle this project and enjoy the rewards of a stunningly renovated home for years to come.
FAQ Overview: Lp Smartside Installation
Can I install LP SmartSide myself, or should I hire a professional?
While DIY installation is possible, it requires skill and attention to detail. Hiring a professional ensures proper installation and avoids potential warranty issues.
How long does LP SmartSide siding typically last?
With proper maintenance, LP SmartSide can last for decades, often outlasting other siding materials.
What type of warranty does LP SmartSide offer?
LP SmartSide offers a comprehensive warranty, varying by product and region. Check the manufacturer’s website for specific details.
What tools are essential for LP SmartSide installation?
Essential tools include measuring tapes, circular saw, safety glasses, work gloves, and a nail gun.
How do I clean LP SmartSide siding?
Regularly clean with a garden hose and mild detergent. Avoid harsh chemicals or pressure washers.
