Painting siding transforms your home’s exterior, boosting curb appeal and protecting it from the elements. But tackling this project requires careful planning and execution. From choosing the right paint and prepping the surface to understanding the costs involved and ensuring safety, painting siding is a multifaceted undertaking. This guide covers everything you need to know, whether you’re a seasoned DIYer or hiring professionals.
We’ll delve into the various types of siding suitable for painting, detailing their unique properties and preparation needs. You’ll learn about different paint types, application techniques, and crucial safety precautions. We’ll also provide a cost breakdown to help you budget effectively, along with maintenance tips to extend the life of your freshly painted siding.
Types of Siding Suitable for Painting
Painting your siding can significantly enhance your home’s curb appeal and protect it from the elements. However, the suitability of different siding materials for painting varies considerably, depending on their composition, texture, and porosity. Choosing the right paint and employing proper preparation techniques are crucial for achieving a long-lasting and attractive finish. This section details the characteristics of common siding materials and the preparation methods required before painting.
Siding Material Properties and Paintability
Several siding materials are commonly painted, each presenting unique challenges and opportunities. Wood siding, a classic choice, offers a natural aesthetic but requires careful preparation due to its porous nature. Vinyl siding, popular for its low maintenance, presents a smoother surface, simplifying the painting process but demanding specific paint types to ensure adhesion. Aluminum siding, known for its durability, is relatively easy to paint but may require specialized primers to promote paint adherence. Finally, fiber cement siding, a composite material, combines the benefits of wood and vinyl, providing a paintable surface that requires thorough cleaning before painting.
Preparation Methods for Different Siding Types
The preparation process before painting varies significantly depending on the siding material. Wood siding often requires extensive cleaning to remove dirt, mildew, and loose paint, followed by patching any damaged areas and sanding for a smooth surface. A primer is essential to enhance paint adhesion and prevent the wood from absorbing excessive paint. Vinyl siding, being less porous, needs a thorough cleaning to remove dirt and grime, but generally doesn’t require sanding or extensive patching. However, using a primer specifically designed for vinyl is crucial for proper adhesion. Aluminum siding requires careful cleaning and degreasing to remove any contaminants that might hinder paint adhesion. Finally, fiber cement siding needs a thorough cleaning to remove dirt and any loose particles before priming and painting. Surface imperfections should be addressed prior to painting.
Siding Material Comparison Table, Painting siding
| Siding Material | Paintability | Preparation Steps | Expected Lifespan after Painting (Years) |
|---|---|---|---|
| Wood | Excellent, but requires proper preparation | Cleaning, patching, sanding, priming | 5-10 (depending on paint quality and weather conditions) |
| Vinyl | Good, requires specific vinyl-compatible paint | Cleaning, light sanding (if needed), priming (recommended) | 5-7 (depending on paint quality and weather conditions) |
| Aluminum | Good, may require specialized primer | Cleaning, degreasing, light sanding (if needed), priming | 7-10 (depending on paint quality and weather conditions) |
| Fiber Cement | Excellent, requires thorough cleaning | Cleaning, priming | 10-15 (depending on paint quality and weather conditions) |
Paint Selection and Application for Siding
Choosing the right paint and applying it correctly are crucial for a long-lasting, beautiful finish on your siding. The type of paint you select will significantly impact the durability, appearance, and longevity of your paint job. Proper application techniques, including thorough preparation, are equally important for achieving professional results.
Exterior Paint Types for Siding
Several types of exterior paints are suitable for siding, each with its own advantages and disadvantages. The best choice depends on factors like your budget, the siding material, and the climate.
- Acrylic Paints: These water-based paints are popular due to their ease of application, low odor, and relatively quick drying time. They offer good durability and are available in a wide range of colors. However, they may not be as durable as oil-based paints in extremely harsh weather conditions.
- Oil-Based Paints: Oil-based paints offer superior durability and weather resistance compared to acrylic paints, providing excellent protection against moisture and UV damage. They also tend to produce a smoother, more even finish. However, they have a strong odor, take longer to dry, require mineral spirits for cleanup, and are less environmentally friendly.
- Latex Paints: Latex paints are a type of water-based paint that offer a good balance between durability, ease of application, and environmental friendliness. They are less prone to cracking and peeling than some other options and are generally easy to clean up with soap and water. However, they might not be as durable as oil-based paints in extreme climates.
Surface Preparation for Siding Painting
Proper surface preparation is essential for a successful paint job. Neglecting this step can lead to premature paint failure. This involves thoroughly cleaning the siding to remove dirt, mildew, loose paint, and other debris.
- Cleaning: Use a pressure washer or a stiff brush and a solution of water and a mild detergent to clean the siding. Pay close attention to areas with mildew or heavy dirt buildup.
- Repairing: Repair any damaged siding, such as cracks or holes, using appropriate patching materials. Allow ample drying time before proceeding.
- Caulking: Caulk any gaps or cracks between siding panels to prevent moisture intrusion. Choose a high-quality exterior-grade caulk.
- Priming: Apply a high-quality exterior primer to ensure proper adhesion of the paint and to provide a uniform surface. This is especially important on bare wood or previously painted surfaces with significant imperfections.
Painting Siding: A Step-by-Step Guide
The following steps provide a comprehensive guide for painting your siding, ensuring a professional-looking and long-lasting finish. Remember to always check the weather forecast and avoid painting in direct sunlight, rain, or high humidity.
- Choose the right day: Select a day with mild temperatures, low humidity, and no rain in the forecast. Ideal temperatures are typically between 50°F and 80°F (10°C and 27°C).
- Protect surrounding areas: Cover plants, windows, and other surfaces that you don’t want to be painted using drop cloths or painter’s tape.
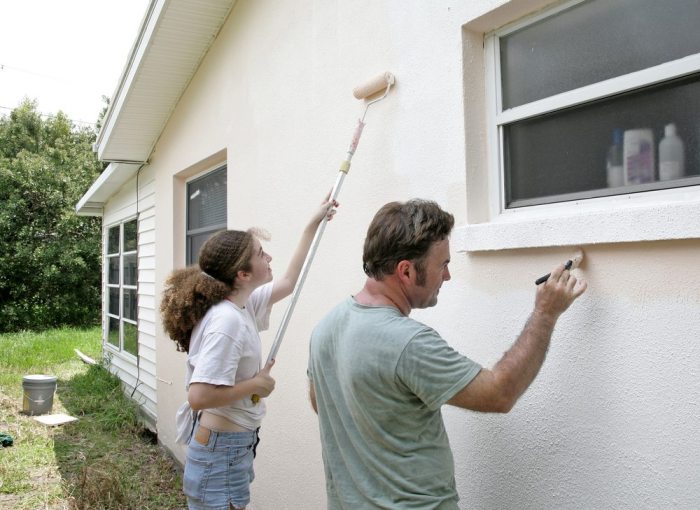
- Apply the first coat: Using a high-quality brush, roller, or sprayer, apply an even coat of paint to the siding, working in small sections. Ensure complete coverage without drips or runs.
- Allow sufficient drying time: Allow the first coat to dry completely according to the manufacturer’s instructions before applying a second coat.
- Apply the second coat: Apply a second coat of paint, following the same technique as the first coat. This will provide a more durable and even finish.
- Clean up: Clean your brushes, rollers, and other equipment immediately after painting, using the appropriate solvent (water for latex paints, mineral spirits for oil-based paints).
Preparing the Surface for Painting

Proper surface preparation is crucial for a long-lasting and aesthetically pleasing paint job on your siding. Neglecting this step can lead to premature paint failure, requiring costly repairs and repainting in the near future. This section details the necessary steps for cleaning, repairing, and preparing various siding materials for optimal paint adhesion.
Cleaning and Preparing Different Siding Materials
Effective cleaning removes dirt, mildew, loose paint, and other contaminants that interfere with paint adhesion. The cleaning method depends heavily on the siding material. For example, wood siding often requires more gentle treatment than vinyl or aluminum.
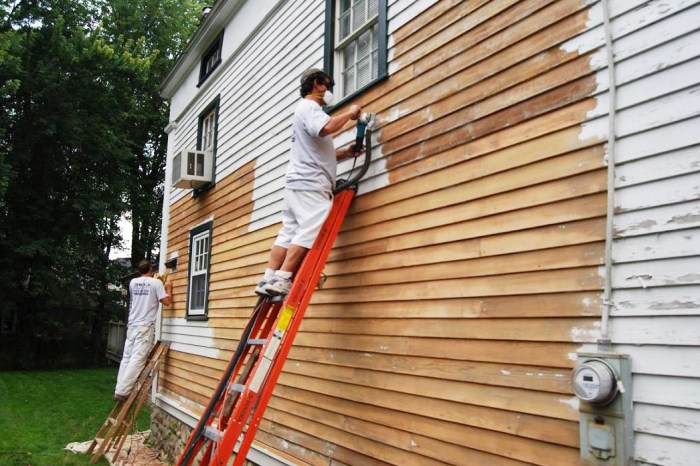
- Wood Siding: Begin by removing loose paint and debris using a stiff-bristled brush or scraper. For stubborn mildew, a solution of one part bleach to three parts water can be applied, followed by thorough rinsing. Power washing can be used cautiously, maintaining a safe distance to avoid damaging the wood. Always allow the siding to dry completely before painting.
- Vinyl Siding: Vinyl siding is typically cleaned with a power washer, using a low-pressure setting and a wide-angle nozzle to prevent damage. A solution of mild detergent and water can be used for tougher stains. Avoid using harsh chemicals or abrasive cleaners.
- Aluminum Siding: Aluminum siding is relatively easy to clean. A power washer with a low-pressure setting is effective, followed by a rinse with clean water. For stubborn dirt or grime, a mild detergent solution can be used.
- Fiber Cement Siding: Fiber cement siding is durable but can be susceptible to cracking. Gentle cleaning with a soft brush and a solution of mild detergent and water is recommended. Avoid high-pressure power washing, as it can damage the surface.
Addressing Common Siding Problems
Before painting, addressing existing issues is vital for a successful outcome. Ignoring problems like cracks, peeling paint, and mildew will only lead to paint failure.
- Cracks: Small cracks can be filled with exterior-grade caulk. Larger cracks may require more extensive repairs, possibly involving replacing damaged sections of siding. Caulk should be applied smoothly and allowed to cure completely before painting.
- Peeling Paint: All loose and flaking paint must be removed completely using a scraper and wire brush. This ensures proper adhesion of the new paint. Sanding may be necessary to create a smooth surface for better paint application.
- Mildew: Mildew is a common problem, particularly in humid climates. A bleach solution (as described above) effectively kills mildew. Always rinse thoroughly and allow the siding to dry completely before painting. A mildew-resistant primer can further help prevent future mildew growth.
Repairing Damaged Siding Sections
Repairing damaged siding sections requires careful attention to detail to ensure a seamless finish. The specific repair method will depend on the type and extent of the damage.
For example, replacing a damaged section of wood siding involves removing the damaged piece, carefully measuring the replacement piece, and securing it using appropriate nails or screws. The new piece should be painted to match the existing siding. For minor damage, wood filler can be used to repair small holes or cracks, ensuring a smooth surface before painting. For vinyl siding, damaged panels often need complete replacement, ensuring proper interlocking with adjacent panels. Similar care should be applied to fiber cement siding, taking care to ensure proper sealing and fastening.
Cost Considerations and Budgeting for Painting Siding
Painting your home’s siding is a significant investment, and understanding the associated costs is crucial for successful project planning. This section breaks down the expenses involved, helping you create a realistic budget whether you choose to hire professionals or tackle the job yourself. Accurate cost estimation ensures you avoid unexpected financial burdens and allows for informed decision-making.
Material Costs
Material costs represent a substantial portion of the overall painting budget. These costs vary depending on the size of your house, the type of siding, the quality of paint chosen, and the number of coats required. For example, a gallon of high-quality exterior paint can range from $30 to $80 or more, while primer might cost between $20 and $40 per gallon. Additional materials like brushes, rollers, drop cloths, painter’s tape, and cleaning supplies will add to the total. Consider purchasing higher-quality materials for better longevity and coverage, even if it increases upfront costs. For a 2,000 square foot house with average siding, expect to spend between $500 and $1500 on paint and materials alone.
Labor Costs
Hiring professional painters significantly increases the overall cost, but it often saves time and ensures a high-quality finish. Professional painters typically charge by the square foot, with prices ranging from $1 to $5 per square foot, depending on location, complexity of the job, and the painter’s experience. Factors such as the need for scaffolding, extensive surface preparation, or multiple coats of paint will also impact the final labor cost. For a 2,000 square foot house, labor costs could range from $2,000 to $10,000. This cost can be significantly reduced by opting for a DIY approach.
Equipment Rental Costs
If you’re undertaking a DIY project, you might need to rent equipment like scaffolding, power washers, and paint sprayers. Rental costs vary depending on the equipment and rental duration. A power washer rental might cost around $50-$100 per day, while scaffolding rental can range from $50 to $200 or more per day, depending on size and height. Careful planning and efficient use of rented equipment can minimize these costs. For a typical house painting project, equipment rental costs could range from $100 to $500.
Professional vs. DIY Pricing Structures
Professional painting services offer a fixed price or a price per square foot. They typically handle all aspects of the project, including surface preparation, painting, and cleanup. DIY projects, while initially cheaper due to lower labor costs, may require significant upfront investment in materials and equipment. Hidden costs associated with unexpected repairs or material shortages can also inflate the overall budget for DIY projects. Consider the time commitment and your skill level before opting for a DIY approach. A simple comparison might show that a professional might charge $4,000 for a job that would cost a DIYer $2,000 in materials and $500 in equipment rental, but the DIYer spends 50 hours of their own time (worth potentially $1000).
Sample Budget Spreadsheet
The following represents a sample budget spreadsheet for painting the siding of a typical house. Remember that these are estimates, and your actual costs may vary.
| Item | Quantity | Unit Cost | Total Cost |
|————————–|———-|———–|————|
| Paint (Exterior) | 5 gallons | $50 | $250 |
| Primer | 2 gallons | $30 | $60 |
| Brushes, Rollers, etc. | 1 set | $75 | $75 |
| Drop cloths, Tape, etc. | 1 set | $50 | $50 |
| Power Washer Rental | 1 day | $75 | $75 |
| Scaffolding Rental (optional)| 2 days | $100 | $200 |
| Material Costs | | | $710 |
| Labor (Professional) | | $2/sq ft | $4000 |
| Labor (DIY – Time Value)| | $20/hr | $1000 |
| Total Project Cost | | | $5710 (Professional), $1710 (DIY) |
Maintaining Painted Siding

Proper maintenance is crucial for extending the lifespan of your freshly painted siding and preserving its aesthetic appeal. Neglecting maintenance can lead to premature deterioration, requiring costly repairs or even complete repainting far sooner than expected. A proactive approach, incorporating regular cleaning, inspections, and timely touch-ups, will significantly enhance the longevity of your investment.
Regular cleaning removes dirt, debris, and pollutants that can damage the paint and promote mildew growth. Annual inspections help identify and address minor issues before they escalate into major problems. Prompt touch-ups prevent small imperfections from becoming large, unsightly areas of damaged paint. This preventative approach is far more economical and less disruptive than dealing with extensive repairs later.
Preventative Maintenance Strategies
Preventative maintenance involves a combination of regular cleaning, thorough inspections, and proactive touch-ups. A consistent schedule will help ensure your siding remains in optimal condition for years to come.
- Regular Cleaning: Clean your siding at least once or twice a year, more frequently if you live in a particularly dusty or polluted area. Use a soft-bristled brush or a pressure washer (at a low setting to avoid damaging the paint) and a mild detergent solution. Rinse thoroughly with clean water.
- Annual Inspections: Conduct a thorough visual inspection of your siding annually, looking for signs of peeling, chipping, fading, or mildew growth. Pay close attention to areas prone to moisture buildup, such as corners and around windows and doors.
- Prompt Touch-Ups: Address any small areas of peeling, chipping, or fading paint immediately. Use a high-quality exterior paint that matches your existing siding color for seamless repairs. Small touch-ups are much less time-consuming and less expensive than larger repairs.
Addressing Common Issues
Even with preventative maintenance, some issues may arise. Recognizing and addressing these promptly is key to preventing further damage.
- Peeling Paint: Peeling paint usually indicates underlying problems such as moisture intrusion or poor surface preparation during the initial painting process. Before repainting, the affected area must be thoroughly cleaned, scraped to remove loose paint, and primed before applying a new coat of paint. In severe cases, professional help may be necessary.
- Fading Paint: Fading is often caused by prolonged exposure to sunlight and UV rays. Choosing a high-quality exterior paint with UV protection can help mitigate this. Repainting with a fresh coat of paint can restore the siding’s original color and vibrancy.
- Mildew Growth: Mildew thrives in damp, shady areas. Regular cleaning with a solution of bleach and water (always following product instructions carefully) can effectively remove mildew. Ensure the area is thoroughly rinsed afterward. For persistent mildew, consider using a mildew-resistant paint.
Appropriate Cleaning Solutions and Techniques
Using the wrong cleaning solutions or techniques can damage your painted siding. Always test any cleaning solution on a small, inconspicuous area first to ensure it doesn’t harm the paint. Avoid abrasive cleaners or brushes that could scratch the surface. For pressure washing, maintain a safe distance and use a low-pressure setting to prevent damage. For mildew removal, a solution of one part bleach to three parts water is generally effective, but always follow the manufacturer’s instructions on the bleach container. Thorough rinsing is crucial after any cleaning to remove all traces of cleaning solution.
Safety Precautions When Painting Siding

Painting siding, especially on multi-story homes, presents several safety risks. Failure to adhere to proper safety protocols can lead to serious injuries or even fatalities. This section details essential precautions to ensure a safe and successful painting project.
Working at Heights
Working at heights necessitates careful planning and the use of appropriate safety equipment. Never attempt to reach high areas without a stable and properly positioned ladder. Always ensure the ladder is on a level surface, extending at least three feet above the roofline for added stability. Inspect the ladder before each use for any signs of damage or weakness. For extensive work at heights, consider using scaffolding, which offers a more stable and secure working platform. For added security, especially when working on steep roofs or unstable surfaces, a safety harness attached to a secure anchor point is crucial. This harness will prevent falls should a mishap occur. Never overreach while on a ladder; always maintain three points of contact (two hands and one foot or two feet and one hand).
Hazards Associated with Painting Equipment and Chemicals
Paint sprayers, brushes, rollers, and other painting equipment pose potential hazards if not handled correctly. Rotating parts of sprayers can cause injury if not properly guarded or if clothing gets caught. Always wear appropriate safety glasses or goggles to protect your eyes from paint splatters or debris. Respirators are essential when using sprayers or working with paints containing volatile organic compounds (VOCs), as these fumes can be harmful if inhaled. Furthermore, paints and solvents are often highly flammable; keep them away from open flames or sparks. Proper ventilation is crucial to minimize the risk of fire and to prevent the build-up of harmful fumes. Always read and follow the manufacturer’s instructions for safe handling and disposal of paint and solvents. Gloves should be worn to protect skin from prolonged exposure to paint and chemicals.
Safety Equipment and Procedures Checklist
Before commencing any painting work, a thorough safety checklist should be completed. This ensures all necessary precautions are in place.
- Pre-Painting Checklist: Inspect ladders and scaffolding for stability and damage. Gather all necessary safety equipment (safety glasses, respirator, gloves, harness, etc.). Check weather conditions – avoid painting in rain, high winds, or extreme temperatures.
- During Painting Checklist: Maintain three points of contact when using ladders. Use caution when working near electrical wires. Regularly clear debris to prevent slips and falls. Take breaks to avoid fatigue. Maintain proper ventilation when using sprayers or working with solvents.
- Post-Painting Checklist: Properly clean and store all equipment. Dispose of paint and solvents according to local regulations. Inspect the work area for any hazards that may have been created during the painting process. Wash hands and exposed skin thoroughly.
Successfully painting your siding involves a blend of meticulous preparation, careful paint selection, and diligent application. By following the steps Artikeld in this guide, you can achieve a stunning, long-lasting finish that enhances your home’s beauty and value. Remember to prioritize safety throughout the process, and don’t hesitate to seek professional help if needed for complex repairs or high-reach work. With the right approach, your freshly painted siding will be a source of pride for years to come.
FAQ Compilation
Can I paint over existing paint?
Yes, but only if the existing paint is in good condition and properly adhered. Peeling or flaking paint must be removed before repainting.
How long does siding paint typically last?
The lifespan varies depending on the paint type, siding material, and weather conditions. High-quality paints can last 5-10 years or more.
What’s the best time of year to paint siding?
Spring or fall, when temperatures are moderate and humidity is low, is generally ideal. Avoid painting in direct sunlight or extreme heat.
How much paint do I need?
Calculate the square footage of your siding and check the paint can for coverage per gallon. It’s always better to have a little extra.
What should I do if I see mildew on my siding?
Clean the affected areas with a mildew-killing solution before painting. Ensure proper ventilation and wear protective gear.


