Shingle siding offers a classic and versatile exterior cladding option for homes, boasting a wide array of materials, styles, and colors. From the traditional charm of wood shingles to the low-maintenance appeal of vinyl, understanding the nuances of each type is crucial for making an informed decision. This guide delves into the intricacies of shingle siding, covering everything from installation and maintenance to cost considerations and environmental impact. We’ll explore the diverse options available, helping you choose the perfect shingle siding to enhance your home’s curb appeal and longevity.
Whether you’re a homeowner embarking on a renovation project or a contractor seeking comprehensive knowledge, this guide provides a detailed overview of shingle siding. We’ll cover the various materials, installation processes, maintenance strategies, and cost factors associated with this popular exterior finish. By the end, you’ll possess a thorough understanding of shingle siding, empowering you to make well-informed choices for your project.
Types of Shingle Siding
Shingle siding offers a versatile and aesthetically pleasing exterior cladding option for homes. Its varied textures and colors provide significant design flexibility, while the overlapping nature of the shingles contributes to weather protection. However, the choice of shingle material significantly impacts longevity, maintenance needs, and overall cost. Understanding the different types available is crucial for making an informed decision.
Asphalt Shingle Siding
Asphalt shingle siding is the most common and budget-friendly option. Manufactured from a combination of asphalt, fiberglass mat, and mineral granules, it’s lightweight, easy to install, and comes in a wide array of colors and styles to mimic more expensive materials like wood shakes. However, its lifespan is relatively shorter compared to other options, and it’s susceptible to damage from extreme weather conditions. Regular maintenance, such as cleaning and occasional repairs, is necessary to maintain its appearance and functionality. Its relatively low cost makes it a popular choice for homeowners on a budget.
Wood Shingle Siding
Wood shingle siding, often made from cedar, redwood, or other durable wood species, offers a classic and timeless aesthetic. It provides excellent insulation and breathability, contributing to a comfortable indoor environment. However, wood shingles require significant maintenance, including regular staining or painting to protect against rot, insect infestation, and weathering. Their lifespan can vary greatly depending on the wood type, climate, and maintenance practices, but with proper care, they can last for decades. The initial cost is typically higher than asphalt shingles, but the natural beauty and potential longevity can make it a worthwhile investment.
Fiber Cement Shingle Siding
Fiber cement shingles combine the durability of cement with the workability of wood fibers. This creates a siding option that is exceptionally resistant to fire, rot, insects, and extreme weather. Fiber cement shingles boast a significantly longer lifespan than asphalt or even many wood options, requiring minimal maintenance. While the initial cost is higher than asphalt, the reduced maintenance and extended lifespan can lead to long-term cost savings. The appearance can mimic wood or slate, offering a sophisticated look.
Vinyl Shingle Siding
Vinyl shingle siding is a low-maintenance and cost-effective option. It’s resistant to rot, insects, and moisture damage, and it requires minimal upkeep beyond occasional cleaning. Vinyl shingles are lightweight and easy to install, making them a popular choice for DIY projects. However, they are not as durable as fiber cement or even high-quality wood shingles, and they can be susceptible to damage from impact. The color is typically integrated into the material, meaning repainting isn’t an option; replacement is necessary if significant damage occurs. Vinyl offers a relatively short lifespan compared to other options.
Comparison of Shingle Siding Materials
The table below summarizes the key differences between the four shingle siding materials discussed.
| Material | Style Examples | Approximate Lifespan (Years) | Maintenance Requirements |
|---|---|---|---|
| Asphalt | Varied styles mimicking wood shakes, slate, etc.; typically available in a wide range of colors. Imagine a dark grey shingle mimicking slate, a reddish-brown mimicking cedar shakes, or a light grey that resembles stone. | 15-30 | Regular cleaning; occasional repairs; potential for algae growth in humid climates. |
| Wood | Traditional cedar shakes with varying thicknesses and textures; imagine a rustic, thick cedar shingle with natural variations in color and grain, or a thinner, more uniform shingle with a smoother finish. | 20-50+ (depending on wood type and maintenance) | Regular staining or painting; occasional repairs; protection from insects. |
| Fiber Cement | Styles that mimic wood shakes, slate, or even stucco; imagine a dark grey shingle designed to look like slate, with a textured surface, or a lighter, wood-grained shingle offering a natural look without the maintenance. | 30-50+ | Occasional cleaning; minimal repairs; highly resistant to weather damage. |
| Vinyl | Typically mimics wood shakes; often available in a limited range of colors. Imagine a relatively uniform light grey shingle with a slightly textured surface, or a dark brown shingle trying to emulate wood grain, but with a less natural appearance. | 15-25 | Occasional cleaning; generally low maintenance but prone to cracking with impact. |
Installation Process of Shingle Siding
Installing shingle siding requires careful planning and execution to ensure a durable and aesthetically pleasing finish. Proper installation prevents issues like water damage, wind damage, and premature deterioration. This process involves several key steps, from initial preparation to final finishing touches. Understanding these steps and adhering to best practices is crucial for a successful project.
The installation process is significantly influenced by the type of shingle siding being used, the existing wall structure, and the overall climate. For example, preparation steps might differ depending on whether you’re installing over existing siding or bare framing. Always consult the manufacturer’s instructions for your specific shingle siding product, as variations in installation techniques exist.
Preparation and Planning
Thorough preparation is paramount for a successful shingle siding installation. This involves assessing the existing wall structure, gathering necessary materials, and ensuring appropriate safety measures are in place. Neglecting this stage can lead to significant problems later in the project.
Before beginning, carefully inspect the existing wall for any damage, rot, or insect infestation. Repair any such issues before proceeding. Measure the wall area accurately to determine the required amount of shingle siding and accompanying materials like nails, flashing, and starter strips. Also, ensure you have the necessary tools, including a measuring tape, level, circular saw, hammer, nail gun (optional but recommended), and safety equipment like gloves and eye protection.
Installing the Starter Strip and First Course
The starter strip provides a level, straight base for the first course of shingles and helps ensure even alignment. Correct installation of the starter strip is crucial for the overall look and integrity of the siding.
The starter strip is typically installed horizontally along the bottom edge of the wall, ensuring it’s perfectly level. It should be secured using appropriate nails, following the manufacturer’s recommended spacing. Once the starter strip is in place, the first course of shingles is installed, overlapping the starter strip according to the manufacturer’s specifications. Maintaining consistent spacing and alignment is essential at this stage.
Installing Subsequent Courses of Shingle Siding
Subsequent courses are installed, overlapping the previous course, following the manufacturer’s guidelines for shingle exposure and overlap. Consistent shingle exposure creates a uniform and aesthetically pleasing look. Maintaining a consistent pattern prevents water penetration and wind damage.
Each shingle course should be carefully aligned and nailed securely, ensuring proper penetration into the wall framing. Use the appropriate nails and nail spacing as recommended by the manufacturer. Regularly check the alignment using a level to prevent unevenness or sagging. For larger projects, working with a partner can significantly improve efficiency and accuracy.
Installing Corners, Trim, and Flashing
Proper installation of corners, trim, and flashing is crucial for protecting the building from water damage and ensuring a professional finish. These elements provide a weather-resistant seal and a clean aesthetic.
Corners and trim pieces should be installed according to the manufacturer’s instructions, ensuring proper overlap and sealing. Flashing should be installed around windows, doors, and other openings to prevent water penetration. Pay close attention to detail in these areas, as they are particularly vulnerable to water damage. Using caulk to seal joints further enhances weather resistance.
Finishing Touches and Cleanup
After installing all shingle courses, corners, and trim, inspect the entire installation for any loose shingles or gaps. Addressing these issues promptly prevents future problems. Finally, clean up any debris and dispose of it properly.
A final inspection ensures the entire installation meets the manufacturer’s specifications and building codes. Any necessary repairs should be made before the project is considered complete. Cleaning up the work area is essential for safety and leaves a professional impression. This final step ensures the project’s overall success.
Maintenance and Repair of Shingle Siding
Proper maintenance and timely repairs are crucial for extending the lifespan of shingle siding and maintaining its aesthetic appeal. Neglecting these aspects can lead to significant damage, costly repairs, and even structural problems. Understanding common issues and implementing preventative measures is key to preserving your home’s exterior.
Common Problems and Their Causes, Shingle siding
Several factors contribute to the deterioration of shingle siding. Moisture intrusion, a primary culprit, causes rotting, warping, and the growth of mold and mildew. This can stem from inadequate flashing around windows and doors, damaged or missing shingles, or poor drainage away from the house. Extreme weather conditions, including strong winds, hail, and heavy snow, can also cause damage, dislodging shingles or creating cracks. Sun exposure leads to fading and degradation of the shingle material over time, especially in areas with intense UV radiation. Finally, pest infestations, such as carpenter ants or termites, can compromise the structural integrity of the wood underlying the shingles.
Cleaning and Maintaining Shingle Siding
Regular cleaning helps prevent many problems. A gentle cleaning with a pressure washer (using a low-pressure setting to avoid damaging the shingles) and a solution of mild detergent and water is effective in removing dirt, grime, and loose debris. Always test the cleaning solution in an inconspicuous area first to ensure it doesn’t damage the finish. For mold and mildew, a bleach solution (mixed according to manufacturer instructions) can be applied, followed by a thorough rinsing. Annual inspections are recommended to identify potential issues early on. Addressing minor problems promptly prevents them from escalating into larger, more expensive repairs. Consider using a sealant on exposed wood edges to further protect against moisture intrusion.
Repairing Damaged Shingle Siding
Repairing damaged shingle siding involves a range of techniques depending on the extent of the damage. Replacing individual shingles requires carefully removing the damaged shingle, ensuring the underlying structure is sound, and securing a replacement shingle with appropriate nails. For larger areas of damage, such as sections affected by rot or severe weather, more extensive repairs might be necessary. This could involve replacing multiple shingles, or in severe cases, replacing entire sections of siding. It’s important to match the new shingles as closely as possible to the existing siding to maintain a uniform appearance. If you lack the skills or experience for these repairs, it’s best to consult a qualified contractor. Using high-quality replacement shingles and proper installation techniques are essential to ensure a long-lasting repair. For example, using galvanized nails instead of standard nails will significantly improve the longevity of the repair.
Cost Considerations for Shingle Siding
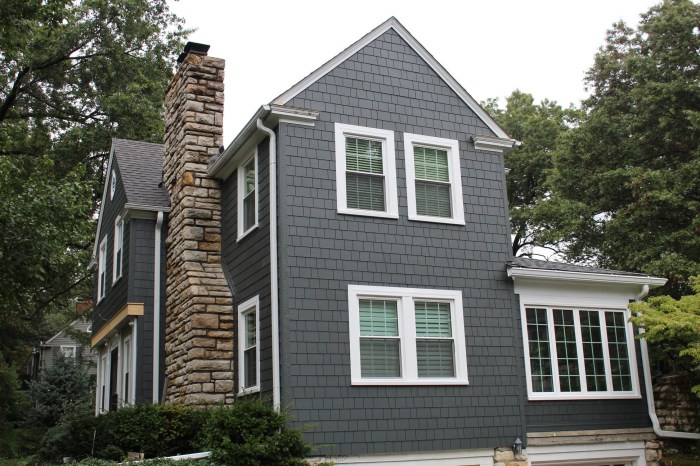
The cost of installing shingle siding on your home is influenced by a variety of factors, making it crucial to understand these variables before embarking on your project. Accurate budgeting requires considering material choices, the complexity of the installation, and regional pricing differences for both materials and labor. Failing to account for these factors can lead to significant cost overruns.
Factors Influencing Shingle Siding Costs
Several key factors significantly impact the overall cost of a shingle siding project. These include the type of shingle material selected (e.g., cedar, vinyl, fiber cement), the size and complexity of the project (e.g., a simple single-story house versus a multi-level home with intricate architectural details), and the regional variations in material costs and labor rates. Furthermore, permits and other associated costs, such as waste disposal, should be factored into the total budget. Ignoring any of these components can result in an inaccurate cost estimate.
Cost Variations Based on Material Type, Installation Complexity, and Regional Differences
Material costs vary widely depending on the type of shingle. For example, natural cedar shingles are typically more expensive than vinyl or fiber cement alternatives. Installation complexity also plays a crucial role. A simple, rectangular home will require less labor and time than a home with dormers, gables, or other architectural features requiring more intricate cutting and fitting. Regional differences in labor costs and material availability further influence the overall cost. Areas with high demand for skilled labor or limited access to specific materials will naturally experience higher prices. For instance, a project in a densely populated coastal region might cost significantly more than a similar project in a rural area.
Cost Breakdown of Shingle Siding Installation
The following table provides a sample cost breakdown for shingle siding installation, highlighting the key cost components. These figures are estimates and can vary significantly based on the factors discussed previously. It’s crucial to obtain multiple quotes from reputable contractors to ensure accurate pricing for your specific project.
| Material | Labor | Permits | Other Costs |
|---|---|---|---|
| $5,000 – $15,000 (depending on material type and house size) | $4,000 – $12,000 (depending on house size and complexity) | $500 – $1,500 (varies by location and permit requirements) | $500 – $2,000 (waste disposal, scaffolding, etc.) |
Environmental Impact of Shingle Siding
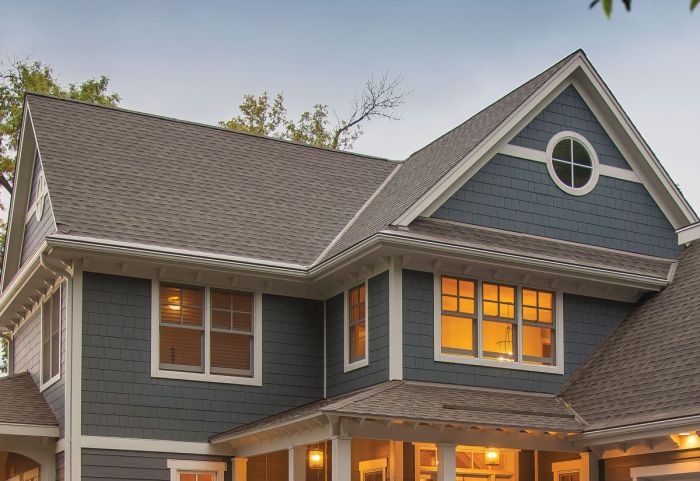
Shingle siding, while offering aesthetic appeal and weather protection, carries a significant environmental footprint across its lifecycle. This impact stems from the raw materials used, the manufacturing process, transportation to the job site, and ultimately, disposal or recycling at the end of its useful life. Understanding the environmental implications of different shingle materials is crucial for making informed choices that minimize ecological damage.
The environmental impact of shingle siding varies considerably depending on the material used. Wood, vinyl, fiber cement, and metal all present different challenges and benefits regarding manufacturing, transportation, and disposal. The energy consumption associated with production, the embodied carbon in the materials, and the potential for recycling or reuse significantly influence the overall environmental score.
Manufacturing Processes and Embodied Carbon
The manufacturing process of each shingle type contributes to its overall environmental impact. Wood shingles, for instance, require harvesting trees, which can lead to deforestation and habitat loss if not managed sustainably. The manufacturing process itself involves energy consumption for cutting, shaping, and treating the wood to enhance its durability and resistance to rot and insects. Vinyl siding production is energy-intensive, relying heavily on fossil fuels and resulting in greenhouse gas emissions. Fiber cement shingles, while durable and requiring less maintenance, involve cement production, a process known for its high carbon footprint. Metal shingles, often made from steel or aluminum, have a high embodied energy due to the mining and processing of these metals. The embodied carbon, representing the total greenhouse gas emissions associated with a material’s production, varies significantly between these materials, with wood and fiber cement generally having higher values than vinyl or metal in certain contexts, depending on sourcing and manufacturing practices.
Transportation and Logistics
Transportation of shingle siding materials from manufacturing facilities to distribution centers and ultimately to construction sites adds to the environmental impact. The distance traveled, the mode of transportation (trucking is most common), and the fuel efficiency of the vehicles all contribute to greenhouse gas emissions. Heavier materials, such as fiber cement, require more fuel-intensive transportation compared to lighter options like vinyl. Efficient logistics and optimized transportation routes can help mitigate this impact.
Disposal and Recyclability
The end-of-life management of shingle siding significantly influences its environmental impact. Wood shingles, while potentially biodegradable, often end up in landfills. Vinyl siding is not readily biodegradable and usually ends up in landfills as well, contributing to plastic waste accumulation. Fiber cement shingles can be disposed of in landfills, but some components might be recyclable depending on local regulations and facilities. Metal shingles have higher recyclability rates compared to other materials, as scrap metal can be reused in the manufacturing of new products. The availability of recycling programs and the willingness of homeowners and contractors to participate in these programs are critical factors in reducing the environmental burden of shingle siding disposal.
Energy Efficiency Implications
The energy efficiency of a building is also impacted by the type of shingle siding used. Darker colored shingles absorb more solar radiation, leading to increased heat absorption and potentially higher cooling costs in warmer climates. Lighter-colored shingles reflect more sunlight, reducing heat gain and improving energy efficiency. While shingle siding itself doesn’t directly generate or consume energy, its impact on building insulation and heat transfer influences the overall energy performance of a home. High-performance insulation underneath the siding plays a more significant role in energy efficiency than the siding material itself.
Shingle Siding Styles and Design Considerations
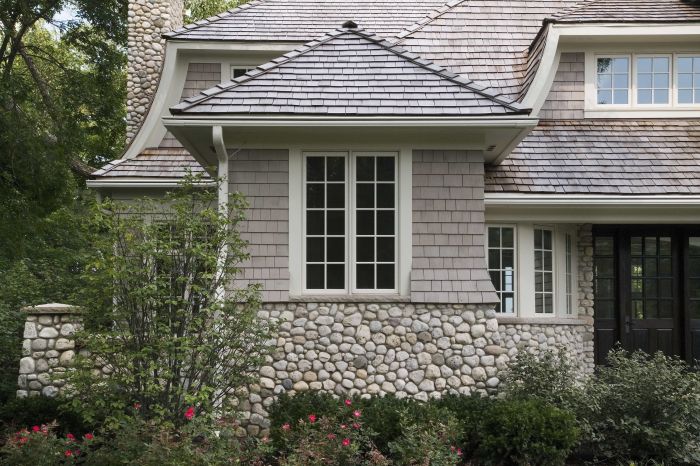
Shingle siding offers a remarkable versatility in design, allowing homeowners to achieve a wide range of aesthetic effects depending on the architectural style of their home. Careful consideration of shingle type, color palette, and texture can significantly impact the overall curb appeal and enhance the home’s architectural features. The following examples illustrate how shingle siding can be effectively integrated into different architectural styles.
Shingle Siding Design Examples for Various Architectural Styles
The choice of shingle siding significantly influences the overall aesthetic of a home. Different shingle types, color palettes, and textures can dramatically alter the visual impact, complementing or clashing with existing architectural elements. Below is a table illustrating this versatility across various architectural styles.
| Architectural Style | Shingle Type | Color Palette | Descriptive Image |
|---|---|---|---|
| Victorian | Wood Shakes, varying lengths and thicknesses for a textured look | Deep greens, muted browns, and burgundy accents. A darker base color with lighter trim would highlight the intricate details of Victorian architecture. | Imagine a house with steeply pitched gables and ornate detailing. The wood shakes are layered in a slightly irregular pattern, creating depth and shadow. The deep green base color is punctuated by burgundy trim around the windows and eaves, creating a rich and complex visual effect. The texture of the shakes is clearly visible, adding to the overall sense of handcrafted quality. |
| Ranch | Cedar shingles, uniformly sized and neatly installed for a clean look | Neutral tones such as light beige, gray, or taupe. Consider a subtle variation in shade for depth without overwhelming the clean lines of the ranch style. | Picture a single-story home with low-pitched rooflines and expansive windows. The cedar shingles are uniformly sized and neatly installed, creating a clean and contemporary appearance. The light beige color complements the natural surroundings and the expansive windows, creating a feeling of openness and airiness. The texture is smooth and even, providing a consistent visual plane. |
| Colonial | Larger, flatter shingles, perhaps asphalt or fiber cement, creating a more formal look | Classic colors like white, cream, or soft grays. Darker shutters and trim can provide a sharp contrast and highlight the architectural details. | Envision a two-story home with symmetrical facade and tall, slender windows. The larger, flatter shingles create a more formal and refined appearance. The creamy white color is complemented by dark green shutters and trim, which provides a striking contrast and accentuates the symmetry of the design. The texture is relatively smooth, reflecting light evenly across the surface. |
Complementing Exterior Elements with Shingle Siding
Shingle siding’s aesthetic impact is significantly enhanced by how it interacts with other exterior elements. The selection of shingle color and texture should harmonize with windows, doors, and landscaping to create a cohesive and visually appealing design. For example, a deep, rich color of shingle siding can complement darker window frames and a mature, lush landscape, while lighter shingles might work better with lighter-colored doors and a more minimalist landscaping design. The texture of the shingles should also be considered – rougher textures can complement natural stone or brickwork, while smoother shingles might suit a more modern design. The key is to create a balanced and harmonious overall design.
From selecting the right material and navigating the installation process to understanding the long-term maintenance and cost implications, choosing shingle siding involves careful consideration. This guide has provided a comprehensive overview, equipping you with the knowledge to make informed decisions based on your specific needs and preferences. Remember to weigh the pros and cons of each material, factoring in aesthetic appeal, durability, budget, and environmental impact. With the right planning and execution, shingle siding can significantly enhance your home’s beauty and value for years to come.
Questions and Answers
Can I install shingle siding myself?
While possible for some DIY enthusiasts with experience, professional installation is generally recommended for optimal results and to avoid potential issues.
How often should I clean my shingle siding?
Regular cleaning, at least once or twice a year, using a soft brush and water, helps remove dirt and debris, extending the siding’s lifespan.
What is the average lifespan of different shingle siding types?
Lifespans vary greatly depending on material and climate. Asphalt shingles typically last 15-30 years, wood shingles 20-50 years, fiber cement 50+ years, and vinyl 20-40 years.
How do I determine the best shingle siding for my climate?
Consider your local climate conditions – extreme heat, cold, or humidity – when choosing shingle siding. Some materials are better suited to specific climates than others.
Are there any specific building codes I need to be aware of?
Building codes vary by region. Check with your local authorities to ensure compliance before starting your project.
